Guides & FAQs
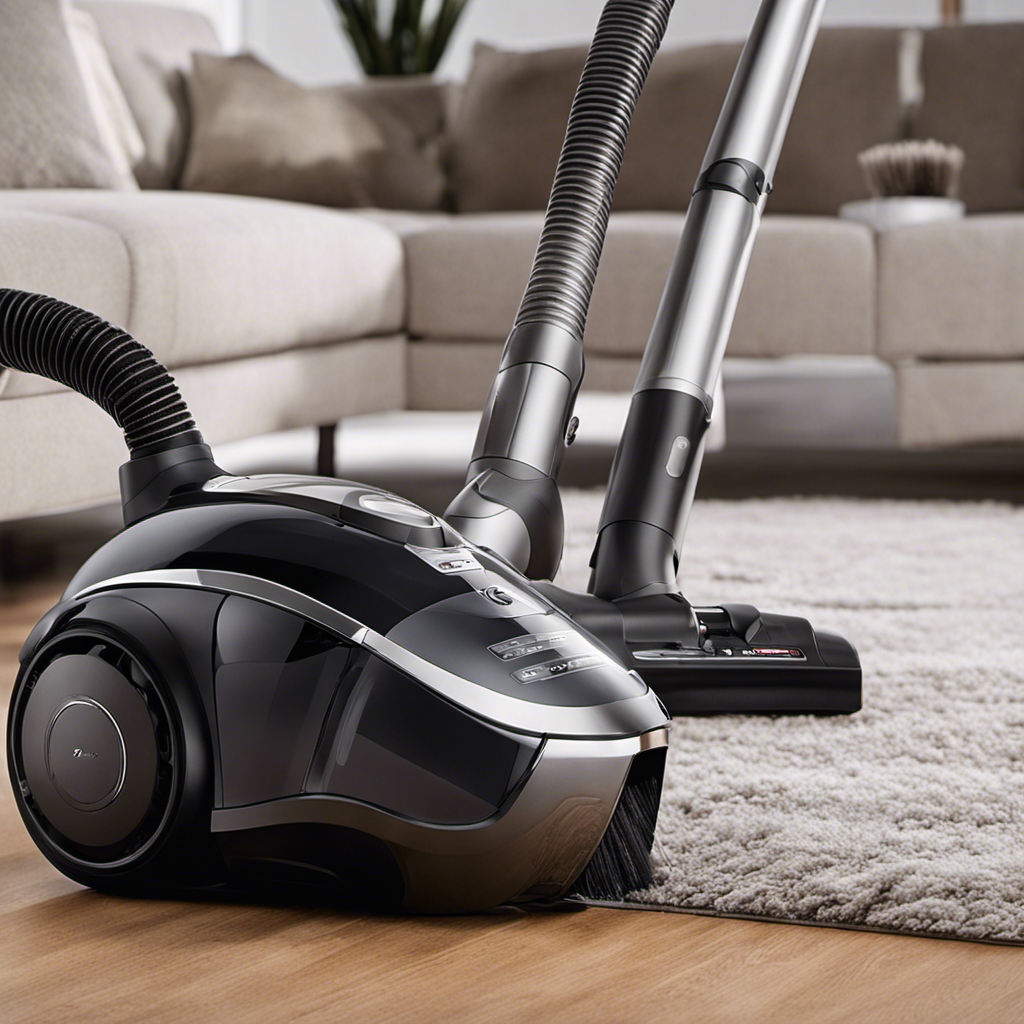
How to Clean Pet Hair From Clothes Washer
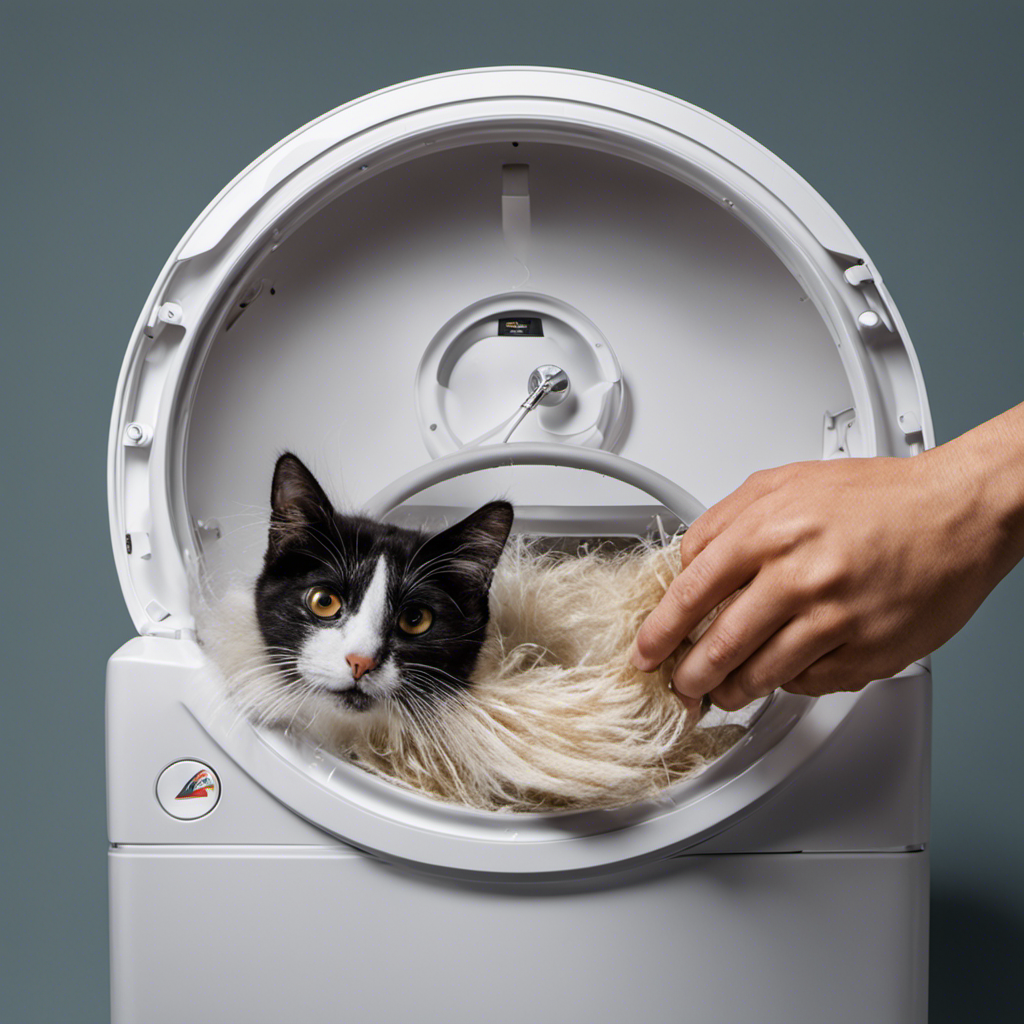
Hey! Imagine this scenario: you’re in the middle of doing your laundry when suddenly, you spot pet fur all over your garments. Quite the hairy scenario, right? But fear not, I’m here to help you out.
In this article, I’ll show you exactly how to clean pet hair from your clothes washer. From assessing the hairy situation to preventing future build-up, I’ll guide you step-by-step.
So grab your lint roller and let’s get those clothes looking fur-free in no time!
Key Takeaways
- Identify problem areas where pet hair accumulates, such as the rubber gasket, lint trap, and drain pump filter.
- Choose the right cleaning products, such as a lint roller or sticky lint brush.
- Regularly groom pets to minimize shedding.
- Use a damp cloth or fabric brush for delicate fabrics like silk or wool.
Assessing the Pet Hair Situation
I’ll start by checking the pet hair situation in my clothes washer. To effectively clean pet hair from the washer, it’s important to identify problem areas where the hair tends to accumulate. These areas may include the rubber gasket, the lint trap, and the drain pump filter.

Once I’ve identified these problem areas, I can move on to choosing the right cleaning products. For removing pet hair, I find that using a lint roller or a sticky lint brush works well. Additionally, a damp microfiber cloth can be used to wipe down the rubber gasket and other surfaces.
Preparing the Washer for Cleaning
To get started, I’ll ensure the washing machine is ready for cleaning by following these steps:
- Open the washing machine door and inspect the seal for any visible pet hair or debris.
- If there’s hair present, use a soft brush or a lint roller to gently remove it from the seal.
- Pay close attention to the corners and crevices where hair tends to accumulate.
- Take care not to damage the seal while removing the hair.
Once the hair is removed from the seal, it’s time to clean the drum.
- Wipe down the interior of the drum with a damp cloth to remove any loose hair or dirt.
- Remove the detergent dispenser and clean it thoroughly.
- Run an empty wash cycle with hot water and a cup of white vinegar to sanitize the machine.
Removing Pet Hair From the Drum and Agitator
After inspecting the seal and cleaning it, I wiped down the drum to remove any loose hair or debris.
As a part of regular dryer maintenance, it’s important to keep the drum clean to ensure optimal performance and prevent any potential issues. Pet hair can easily get trapped in the drum and agitator, causing it to accumulate and affect the efficiency of the machine.
To remove pet hair from the drum and agitator, I used a damp cloth or dryer sheet. I gently wiped the interior of the drum, making sure to reach all the nooks and crannies where hair might be hiding. The slightly damp cloth or dryer sheet helps to attract and capture the pet hair, making it easier to remove.
It’s important to repeat this process regularly to prevent excessive build-up and maintain a clean and efficient dryer.
Cleaning Pet Hair From the Filter and Drain Pump
When cleaning the filter and drain pump, I ensure that any accumulated pet hair is carefully removed to maintain the efficiency of the machine. Pet hair can easily clog the hoses and affect the performance of your clothes washer.
Here are some tips to help you effectively clean pet hair from your washer:
-
Cleaning pet hair from the hoses:
-
Disconnect the hoses from the washer.
-
Use a lint roller or a damp cloth to remove any visible pet hair.
-
Run water through the hoses to flush out any remaining hair.
-
Removing pet hair from the door seal:
-
Wipe the door seal with a damp cloth to loosen the hair.
-
Use a lint brush or a vacuum cleaner with a brush attachment to remove the hair.
-
Rinse the seal with water to remove any remaining hair.
Preventing Future Pet Hair Build-Up
I make sure to regularly groom my pets to minimize the amount of hair they shed in the house. However, despite my best efforts, some pet hair always finds its way onto my clothes and fabrics.
To tackle this issue, I’ve discovered effective pet hair removal techniques for different types of fabric. For clothing made of cotton or polyester, I use a lint roller or a sticky tape to remove the hair.
For more delicate fabrics like silk or wool, I use a damp cloth or a fabric brush to gently brush away the hair.
Additionally, I’ve incorporated some tips into my laundry routine to minimize pet hair. Before washing, I give my clothes a good shake outside to remove loose hair. I also add a fabric softener sheet to the dryer, which helps to attract and collect any remaining pet hair.
Frequently Asked Questions
Can I Use Regular Detergent to Clean Pet Hair From My Clothes Washer?
No, regular detergent is not effective at removing pet hair from a clothes washer. It is recommended to use alternative cleaning agents such as fabric softener to effectively remove pet hair from your clothes washer.
Is It Safe to Use Bleach to Remove Pet Hair From the Drum and Agitator?
Using bleach to remove pet hair from the drum and agitator may be effective, but it can also damage the machine. Consider using vinegar as a safer alternative. Another option is using a lint roller, but it may not be as thorough.
How Often Should I Clean the Filter and Drain Pump to Prevent Pet Hair Build-Up?
I clean the filter and drain pump regularly to prevent pet hair build-up in my clothes washer. It’s an effective way to maintain the machine’s performance and ensure that my clothes come out hair-free.
Can I Use a Vacuum Cleaner to Remove Pet Hair From the Clothes Washer?
Yes, a vacuum cleaner can be used to remove pet hair from the clothes washer, but it has limitations. Alternative methods like using a lint roller or dryer sheets may be more effective in tackling the issue.
What Is the Best Way to Prevent Pet Hair From Clogging the Drain Pump in the Future?
To prevent pet hair from clogging the drain pump in the future, I recommend taking preventive measures such as using a mesh laundry bag or lint trap. Alternatively, you can try using dryer sheets or rubber gloves to remove pet hair before washing.
Conclusion
In conclusion, like a magnet attracting metal shavings, pet hair can find its way into every nook and cranny of your clothes washer. But fear not, with a few simple steps, you can banish pet hair from your machine and keep it running smoothly.
By regularly assessing the situation, preparing the washer, and cleaning the drum, agitator, filter, and drain pump, you can say goodbye to pet hair build-up and hello to fresh, hair-free laundry.

Carter is a valued member of our team at Pet Hair Vacuum Critic, where his passion for pets and exceptional writing skills come together to create informative and engaging content for our readers.
Carter’s journey into the world of pet care and pet hair management began with his own furry companions. As a pet owner, he understands the daily challenges of keeping a clean and tidy home while providing a loving environment for his pets. This personal experience drives his dedication to helping fellow pet owners navigate the world of pet hair removal and management.

I understand your hesitation towards cleaning dust and pet hair from your PC, as it may seem like a bothersome task. However, it is crucial for the health and performance of your computer.
Not only can these particles clog up your computer’s fans and vents, but they can also cause overheating and performance issues.
In this guide, I’ll show you the step-by-step process to effectively remove dust and pet hair from your PC, ensuring it runs smoothly and stays pet-hair free.
Let’s get started!
Key Takeaways
- Regular cleaning of dust and pet hair from your PC is important to prevent clogging of computer fans and vents.
- Accumulated particles can lead to overheating and performance issues, so regular cleaning extends the lifespan of your PC.
- Using the right tools such as compressed air and a soft microfiber cloth ensures a clean and damage-free PC.
- Precautions such as turning off and unplugging the computer, using compressed air carefully, and avoiding liquid cleaners are necessary to prevent damage while cleaning.
Why Is It Important to Clean Dust and Pet Hair From Your PC
I’ve learned that it’s important to clean dust and pet hair from my PC because it can cause overheating and damage to the internal components. Regular PC maintenance brings many benefits, such as an extended lifespan and improved performance. Dust and pet hair can accumulate in the fans, vents, and heat sinks of the computer, obstructing proper airflow and causing the components to work harder. This increased workload can lead to overheating, which can result in system crashes, reduced performance, or even permanent damage to the CPU or GPU.
Additionally, dust can also clog the cooling system, causing it to become less effective. Therefore, it’s vital to regularly clean your PC to prevent these common issues.

Transitioning into the next section, let’s now discuss the tools and materials needed for cleaning dust and pet hair from your PC.
Tools and Materials Needed for Cleaning Dust and Pet Hair From Your PC
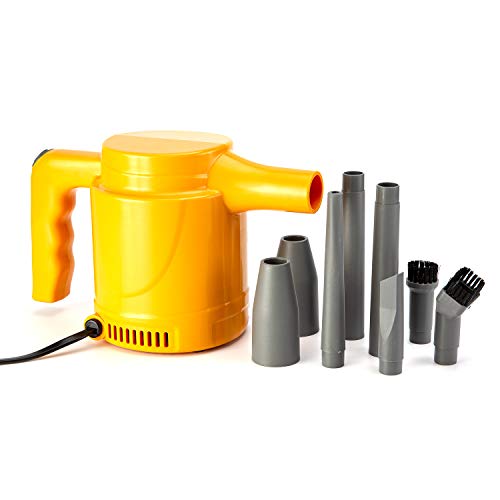
To effectively remove dust and pet hair from my computer, I’ll need a can of compressed air and a soft microfiber cloth. These tools are essential for cleaning the delicate components of my PC without causing any damage.
The can of compressed air is perfect for blowing away dust from hard-to-reach areas such as the keyboard, vents, and fans. The high-pressure air stream dislodges the dust particles, allowing them to be easily removed.
The soft microfiber cloth, on the other hand, is ideal for wiping down the surfaces of my computer and removing any remaining dust or pet hair.
With these tools in hand, I can ensure that my PC stays clean and free from any potential damage caused by dust and pet hair buildup.
Now, let’s move on to the step-by-step guide to cleaning dust and pet hair from your PC.
Step-By-Step Guide to Cleaning Dust and Pet Hair From Your PC
Using a can of compressed air and a soft microfiber cloth, I remove the accumulated debris and ensure the longevity of my computer. Regular PC maintenance is crucial for optimal performance and preventing hardware damage.
Dust and pet hair can clog the fans, causing overheating and reducing airflow, which can lead to system failure. By cleaning the PC regularly, I can maintain proper airflow and prevent overheating.
However, there are common mistakes to avoid during PC cleaning. One mistake is using a vacuum cleaner, as it can generate static electricity and damage sensitive components. Another mistake is spraying liquids directly onto the computer, as it can cause electrical shorts.
It’s important to use the right tools and follow proper cleaning techniques to avoid any potential damage to the PC.
Precautions to Take While Cleaning Dust and Pet Hair From Your PC
While cleaning my computer, it’s important to take precautions to prevent any potential damage. Dust and pet hair can accumulate inside the PC, causing overheating and performance issues.
To ensure safety, always turn off the computer and unplug it from the power source before starting the cleaning process. Use compressed air to blow away the dust and hair from the vents and fans. Be careful not to spray the air too close or too forcefully as it can damage delicate components.
Additionally, use a soft brush or microfiber cloth to gently wipe away any remaining dust. Avoid using liquid cleaners as they can cause damage to the electronic components.
Taking these safety measures will help keep your PC clean and running smoothly.
Tips for Maintaining a Dust and Pet Hair-free PC
Maintaining a dust and pet hair-free computer requires regular cleaning and preventive measures. Here are some tips to help you keep your PC clean and free from these unwanted particles:
-
Use compressed air: Regularly blow out dust and pet hair from your PC using compressed air. This will help remove particles from hard-to-reach areas.
-
Keep your PC elevated: Elevate your PC off the ground to prevent dust and pet hair from settling on the bottom. This can be done using a stand or a simple platform.
-
Clean filters and vents: Regularly clean the filters and vents of your PC to ensure effective air circulation. Clogged filters and vents can restrict airflow, causing dust and pet hair to accumulate.
-
Groom your pets: Regularly groom your pets to minimize shedding. This will help reduce the amount of pet hair that can find its way into your PC.
-
Invest in a dust cover: Consider using a dust cover or case to protect your PC when it’s not in use. This will help prevent dust and pet hair from settling on your computer.
Frequently Asked Questions
How Often Should I Clean Dust and Pet Hair From My Pc?
Not cleaning dust and pet hair from your PC regularly can pose potential risks. Accumulated dust and pet hair can affect performance and lifespan by clogging fans, causing overheating, and reducing airflow.
Can I Use a Vacuum Cleaner to Clean the Dust and Pet Hair From My Pc?
I wouldn’t recommend using a vacuum cleaner to clean your PC. There are better alternatives, like compressed air or an anti-static brush. It’s important to follow best practices for cleaning pet hair to prevent damage to your computer.
Is It Necessary to Shut Down My PC Before Cleaning the Dust and Pet Hair?
It is important to shut down the PC before cleaning dust and pet hair to avoid potential risks. Using a soft brush is crucial for effectively removing debris without damaging internal components.
Can I Use Compressed Air to Clean the Dust and Pet Hair From My Pc’s Components?
Yes, you can use compressed air to clean dust and pet hair from your PC components. However, it’s important to consider alternative cleaning methods and the potential risks and precautions associated with using compressed air.
How Can I Prevent Dust and Pet Hair From Accumulating in My PC in the First Place?
To prevent dust and pet hair buildup in my PC, I employ effective methods for maintaining a clean environment. Regularly dusting and vacuuming the area around my PC, using air filters, and keeping pets away are essential.
Conclusion
In conclusion, maintaining a dust and pet hair-free PC is crucial for its optimal performance and longevity. By regularly cleaning your PC using the appropriate tools and following the step-by-step guide provided, you can ensure its efficiency and prevent any potential damage caused by dust and pet hair accumulation.
Remember to take necessary precautions and implement the tips mentioned to keep your PC clean and free from these unwanted particles. Happy cleaning!

James is an integral member of our Pet Hair Vacuum Critic team, where his love for animals and strong writing skills converge to create informative and engaging content for our readers.
James’s journey into the realm of pet care and pet hair management began with his personal experiences as a pet owner. He understands the daily challenges and joys that come with sharing a home with furry companions, and this personal connection drives his commitment to helping others navigate the world of pet hair removal and management.
As a pet parent, I recognize the significance of maintaining the grooming and comfort of our furry companions.
Did you know that 80% of pet owners struggle with trimming their pet’s hair around the genitals?
In this article, I will guide you through the step-by-step process of trimming pet hair in that delicate area.
From gathering the necessary tools to preparing your pet for the trim, I’ll provide you with the knowledge and tips you need for a safe and successful grooming session.
Key Takeaways
- Trimming around the genitals is important for the overall hygiene and well-being of pets.
- Use high-quality tools designed for sensitive areas to ensure a safe and successful trim.
- Take your time and work slowly, staying gentle and patient to avoid accidents or injuries.
- Reward your pet with treats and praise to create a positive and calming environment during the trim.
Understanding the Importance of Trimming
I understand why trimming is important for the comfort and hygiene of my pet.
Trimming the hair around their genitals provides several hygiene benefits. Firstly, it prevents the accumulation of urine and feces in the hair, reducing the risk of bacterial and fungal infections. Additionally, it helps to keep the area clean and odor-free, preventing any discomfort or irritation for my pet.
Neglecting to trim the hair around their genitals can lead to potential health risks. Excessive hair can trap dirt and debris, creating a breeding ground for parasites like fleas and ticks. It can also result in matting, which can cause pain and discomfort for my pet.
Regular trimming is essential to ensure the overall well-being and hygiene of my furry friend.
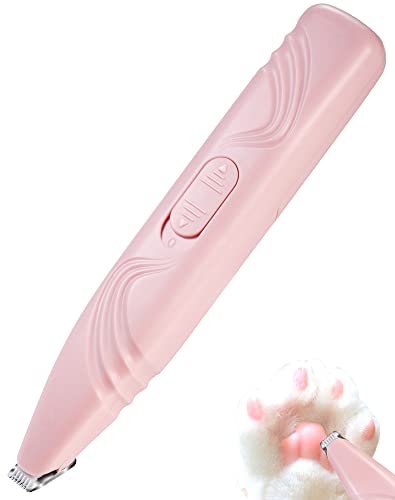
Gathering the Necessary Tools
To get started, I’ll need a pair of grooming scissors and a comb. Choosing the right grooming tools is essential for safely trimming your pet’s hair around their genitals. Here are four important factors to consider when selecting the tools:
-
Safety features: Look for scissors with rounded tips to prevent accidental injuries. Additionally, consider a comb with wide teeth to avoid pulling and tugging on your pet’s delicate skin.
-
Size and comfort: Ensure that the scissors and comb fit comfortably in your hand for better control and precision during the trimming process. This will help minimize any potential harm to your pet.
-
Quality and durability: Invest in high-quality grooming tools that will last longer and provide a smoother trimming experience. Poorly made tools may cause discomfort or uneven cuts.
-
Ease of cleaning: Opt for tools that are easy to clean and maintain. Proper hygiene is crucial to prevent any infections and keep your pet healthy.
Remember to follow safety precautions during trimming, such as taking breaks to avoid fatigue and never rush the process. Your pet’s safety and comfort should always be the top priority.
Preparing Your Pet for the Trim
Ensuring my pet feels calm and relaxed is crucial before beginning the grooming process.
Preparing pets for grooming and dealing with their anxiety during the trim is essential to ensure a smooth and stress-free experience for both of us.
Firstly, I make sure to schedule the grooming session during a time when my pet is usually calm and well-rested.
I create a soothing environment by playing soft music and using aromatherapy to help relax their senses.
Additionally, I give my pet a gentle massage to help alleviate any tension or anxiety they may be feeling.
By taking these steps, I can help my pet feel more at ease and ready for the trim.
With their comfort in mind, I can now move on to the step-by-step guide to trimming their hair around the genitals.
Step-by-Step Guide to Trimming Pet Hair Around Genitals
Creating a calm and relaxed environment for my pet is crucial when trimming in sensitive areas. To ensure a safe and successful trim, it’s important to follow proper grooming techniques and be aware of the potential risks and precautions involved in trimming pet hair around the genitals.
Here are four key steps to guide you through the process:
-
Prepare the area: Before starting, ensure that the area is clean and free of any dirt or debris. This will help prevent any infections or irritations.
-
Use the right tools: Invest in high-quality grooming tools specifically designed for trimming sensitive areas. This will make the process easier and safer for both you and your pet.
-
Take it slow: Trim in small sections, taking breaks as needed. This will help prevent accidental cuts or injuries to your pet’s delicate skin.
-
Stay calm and gentle: Approach the trim with a calm and patient demeanor. Speak soothingly to your pet and reward them with treats and praise throughout the process.
By following these steps, you can ensure a safe and successful trim for your pet’s genital area.
Transitioning into the next section, let’s explore some additional tips and tricks for a safe and successful trim overall.
Tips and Tricks for a Safe and Successful Trim
I’ve found that using a gentle touch and maintaining a steady hand are key when trimming sensitive areas on my pet. When it comes to pet hair trimming, there are a few common mistakes to avoid.
First, never rush the process. Take your time and work slowly to prevent any accidents or injuries.
Second, be careful not to cut too close to the skin, as this can cause irritation or cuts.
Lastly, always use the right tools for the job. Different pet breeds may require different grooming techniques. For example, long-haired breeds may need regular brushing and trimming, while short-haired breeds may only need occasional touch-ups.
It’s important to research and understand the specific needs of your pet’s breed to ensure a safe and successful trim.
Frequently Asked Questions
How Often Should I Trim My Pet’s Genital Hair?
Trimming my pet’s genital hair is important for their hygiene. I should trim it regularly to prevent matting and irritation. It’s essential to use proper tools and techniques to ensure their comfort and safety.
Can I Use Regular Scissors to Trim My Pet’s Genital Hair?
Yes, regular scissors are not recommended for trimming pet genital hair. It’s important to use proper trimming techniques and consider professional grooming services to ensure the safety and comfort of your pet.
Is It Necessary to Trim My Pet’s Genital Hair During the Winter Months?
During the winter months, it is still important to maintain pet hygiene. Trimming genital hair may help prevent matting and discomfort. I once saw my dog struggle with tangled hair, and it made me realize the importance of regular grooming.
Are There Any Specific Products That Can Help Soothe My Pet’s Skin After Trimming Their Genital Hair?
I found some soothing products for post trim care and have tips to prevent skin irritation after trimming genital hair. It’s important to keep your pet comfortable and their skin healthy.
Can I Trim My Pet’s Genital Hair if They Have a Skin Condition or Irritation in That Area?
Sure, I can trim my pet’s genital hair if they have a skin condition or irritation in that area. However, it’s important to use gentle trimming techniques and be aware of common skin conditions that may require extra care.
Conclusion
In conclusion, trimming your pet’s hair around their genitals is an important grooming task that helps maintain their hygiene and prevents discomfort or health issues.
By following the step-by-step guide and using the necessary tools, you can ensure a safe and successful trim.
While some may feel uneasy about this task, remember that it’s a responsible and caring action that contributes to your pet’s overall well-being.
Take the time to learn and practice proper grooming techniques to keep your furry friend happy and healthy.
")
James is an integral member of our Pet Hair Vacuum Critic team, where his love for animals and strong writing skills converge to create informative and engaging content for our readers.
James’s journey into the realm of pet care and pet hair management began with his personal experiences as a pet owner. He understands the daily challenges and joys that come with sharing a home with furry companions, and this personal connection drives his commitment to helping others navigate the world of pet hair removal and management.
Did you realize that on average, adults in the United States inhale about 2,800 gallons of air per day? That’s a significant amount that could include pet hair particles! If you’re fed up with constantly sneezing and wheezing, it’s time to act and manage the situation.
In this article, we’ll explore the best ways to banish pet hair from the air. From vacuuming techniques to air purification systems, we’ve got the expert advice you need to breathe easy again.
Key Takeaways
- Air purifiers with effective filters can help remove pet dander and hair from the air
- Regular cleaning and dusting can help reduce allergens in the air
- Using natural remedies or medication can provide allergy relief from pet hair in the air
- Grooming pets regularly and using protective measures can prevent pet hair from accumulating in the air
Vacuuming Techniques
To effectively remove pet hair from the air, you should try using a vacuum with a high-powered suction and a brush attachment. Vacuuming is one of the most effective pet hair removal techniques.
When vacuuming, make sure to start with the areas where your pets spend the most time, such as their favorite lounging spots or sleeping areas. Use the brush attachment to agitate the pet hair and loosen it from the surfaces.
Move the vacuum in slow, deliberate strokes to ensure that the suction picks up all the hair. Don’t forget to vacuum the furniture, curtains, and other fabric surfaces as well.
Regular vacuuming, at least once or twice a week, will help keep the pet hair under control and improve the air quality in your home.
Air Purification Systems
You can use air purification systems to effectively remove pet hair from the air. Air purifiers are designed to filter out various contaminants, including pet dander and hair, ensuring cleaner and fresher air in your home.
These systems work by drawing in air through a series of filters, which capture and trap particles, such as pet hair, before circulating the purified air back into the room. The filters used in air purifiers are specifically designed to capture even the smallest pet dander particles, which can trigger allergies and respiratory issues in sensitive individuals.
Regularly cleaning and replacing the filters in your air purifier is crucial to maintain its effectiveness. By investing in a high-quality air purification system, you can reduce the amount of pet hair in the air and create a healthier living environment for both you and your pets.
Cleaning Tools and Accessories
Using a vacuum with a rotating brush attachment can effectively remove pet hair from various surfaces in your home. These attachments are specifically designed to agitate and loosen stubborn pet hair, making it easier for the vacuum to suction it away.
Additionally, there are other pet hair removal products available on the market, such as lint rollers and pet hair remover gloves, which can be used on upholstery and clothing to quickly and easily pick up pet hair.
Another useful tool for pet hair removal is an electrostatic duster. These dusters have a static charge that attracts and holds onto pet hair, allowing you to easily remove it from furniture and other surfaces.
By utilizing these cleaning tools and accessories, you can keep your home free from pet hair and reduce the amount of allergens in the air.
Now, let’s explore some effective allergy relief strategies.
Allergy Relief Strategies
One effective strategy for relieving allergies is regularly cleaning and dusting your home to remove allergens. Dust, pet dander, and pollen can accumulate on surfaces and in the air, triggering allergic reactions.
To combat this, consider using natural remedies such as eucalyptus oil or baking soda to help neutralize allergens. These can be sprinkled on carpets, upholstery, and bedding before vacuuming or washing.
Additionally, using a HEPA filter in your vacuum cleaner can help capture even the smallest allergen particles.
If your allergies persist despite these efforts, medication options such as antihistamines or nasal sprays may provide relief. It’s important to consult with a healthcare professional to determine the best option for you.
By incorporating these strategies, you can minimize allergens in your home and alleviate allergy symptoms.
This sets the stage for preventing pet hair accumulation.
Preventing Pet Hair Accumulation
To minimize the accumulation of pet hair in your home, regularly grooming your furry friend is essential. Not only does it help to reduce shedding, but it also keeps your pet’s coat healthy and shiny.
Here are some tips to help you keep pet hair under control:
- Brush your pet’s fur daily to remove loose hair and prevent it from ending up on your furniture and floors.
- Consider using a deshedding tool or a grooming glove to remove excess hair more effectively.
- Give your pet regular baths using pet-friendly shampoo to keep their coat clean and minimize shedding.
In addition to regular grooming, using furniture covers can also help protect your sofas and chairs from pet hair. These covers are designed to be durable and easy to clean, making it easier to maintain a pet-friendly home.
Frequently Asked Questions
How Often Should I Vacuum to Effectively Remove Pet Hair From the Air?
To effectively remove pet hair from the air and improve indoor air quality, you should vacuum regularly. The frequency depends on the amount of pet hair and your specific situation, but aim for at least once or twice a week.
Can Air Purifiers Eliminate Pet Odors as Well as Pet Hair?
Air purifiers can effectively eliminate both pet odors and pet hair from the air. They provide a convenient and efficient solution for maintaining clean indoor air. However, there are alternative methods available as well.
Are There Any Cleaning Tools Specifically Designed for Removing Pet Hair From Upholstery?
To remove pet hair from upholstery, there are cleaning techniques you can try. Vacuuming with a brush attachment or using a lint roller can be effective. If you need professional services, consider hiring a pet hair removal specialist.
What Are Some Natural Remedies for Allergy Relief for Pet Owners?
If you’re looking for natural remedies to relieve allergies caused by pets, there are a few options. Essential oils like lavender and eucalyptus can help, as well as regularly cleaning your home and using air purifiers.
Besides Regular Grooming, What Are Some Additional Tips for Preventing Pet Hair From Accumulating in the Home?
To prevent shedding and reduce allergens, there are additional tips besides regular grooming. These include brushing your pet regularly, using a de-shedding tool, keeping your home clean, and using air purifiers.
Conclusion
So there you’ve it, folks! Tired of pet hair floating around your house like a furry tornado? Fear not!
By utilizing advanced vacuuming techniques, investing in top-notch air purification systems, and arming yourself with the right cleaning tools and accessories, you can banish pet hair from the air like a superhero.
Combine these strategies with allergy relief tactics and a proactive approach to prevent pet hair accumulation, and you’ll be breathing easy in no time.
Good luck on your quest for a hair-free abode!
")
James is an integral member of our Pet Hair Vacuum Critic team, where his love for animals and strong writing skills converge to create informative and engaging content for our readers.
James’s journey into the realm of pet care and pet hair management began with his personal experiences as a pet owner. He understands the daily challenges and joys that come with sharing a home with furry companions, and this personal connection drives his commitment to helping others navigate the world of pet hair removal and management.
-
 Guides & FAQs1 month ago
Local Customer Raves About Prompt Delivery
-
 Vacuums for Pet Hair Removal1 week ago
What Is Different About a Pet Hair Vacuum
-
 Guides & FAQs1 month ago
Local Resident Raves About Amazing Service
-
 Guides & FAQs1 month ago
Local Customer Raves About Graco’s Excellent Service
-
 Guides & FAQs1 month ago
Thrilled Customer Raves About Graco’s Outstanding Products
-
 Guides & FAQs1 month ago
Sydney Customer Raves About Amazing Paint Experience
-
 Guides & FAQs1 month ago
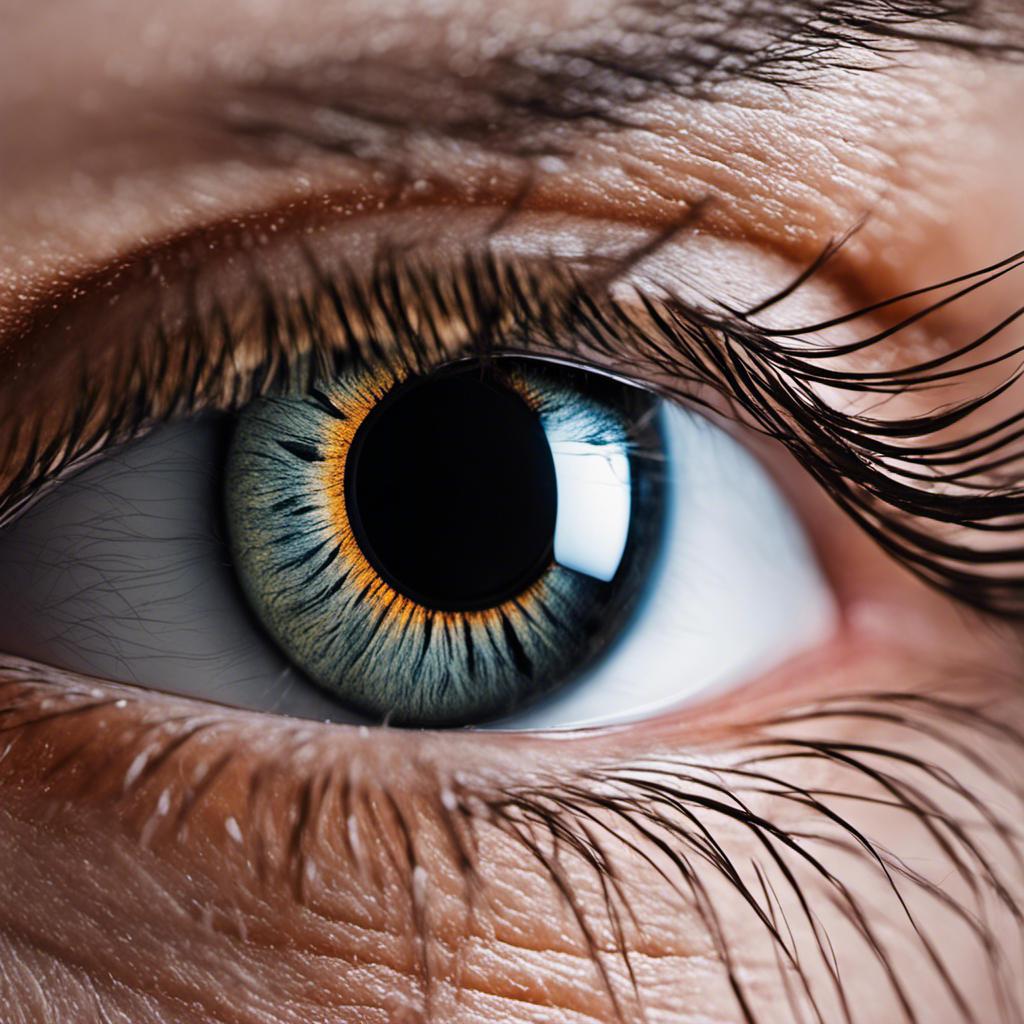
Pet Hair Under Contact Lense, What to Do
-
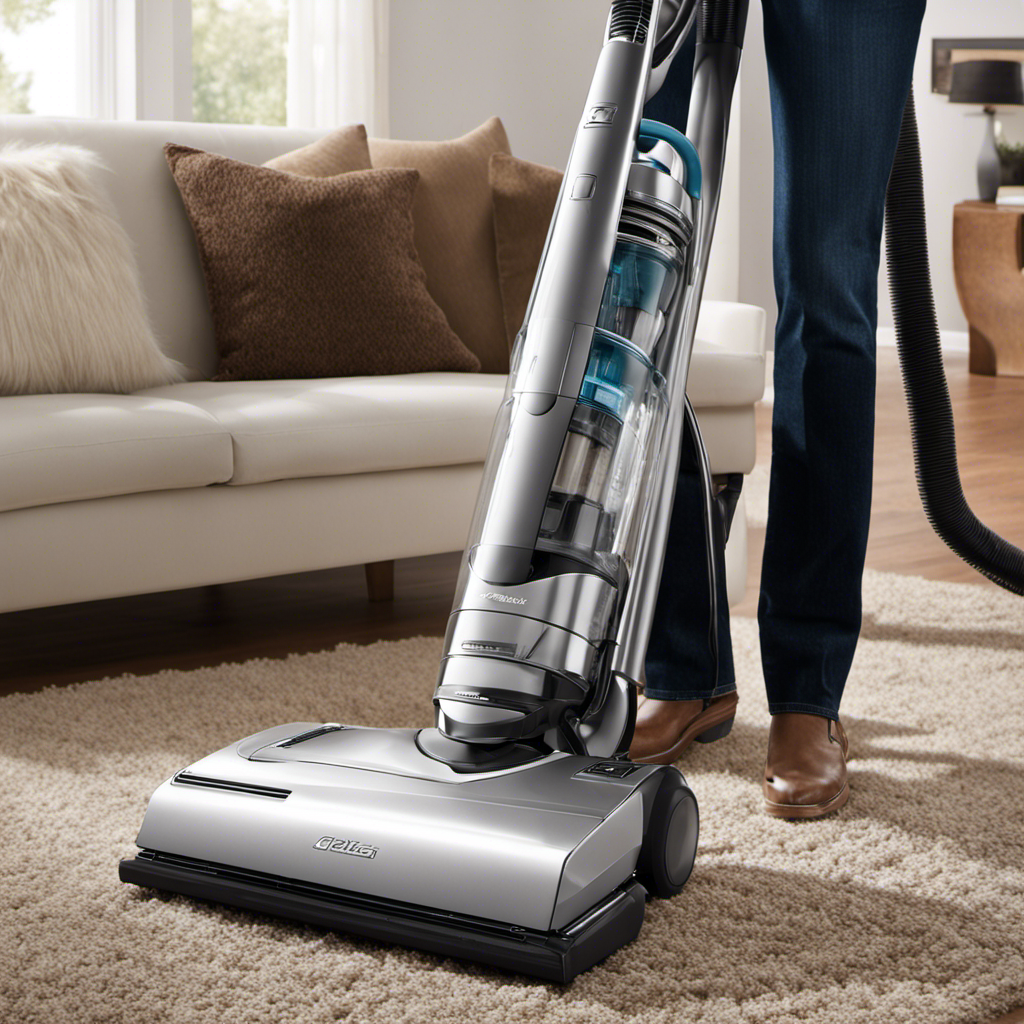 Vacuums for Pet Hair Removal1 week ago
What Is Best Vacuum for Pet Hair