
Pet Hair Removal
Bissell Pet Hair Eraser How to Clean

Hello there! It seems like you’ve gotten yourself a Bissell Pet Hair Eraser, am I correct?
Well, let me tell you, this little gadget is a game-changer when it comes to keeping your home clean from pesky pet hair.
But, here’s the thing – even the best tools need a little TLC every now and then.
In this article, I’m going to walk you through the step-by-step process of how to clean your Bissell Pet Hair Eraser, so you can keep it running smoothly and sucking up every last strand of fur.
Let’s get started, shall we?

Key Takeaways
- Gather necessary cleaning tools: clean, dry cloth, soft-bristle brush, small screwdriver.
- Turn off and unplug the vacuum before cleaning.
- Press release button to remove and empty the dirt container.
- Use the soft-bristle brush to clean the brush roll and remove hair.
Preparing Your Bissell Pet Hair Eraser for Cleaning
I’ll start by preparing my Bissell Pet Hair Eraser for cleaning.
The first step is to gather all the necessary cleaning tools. You’ll need a clean, dry cloth, a soft-bristle brush, and a small screwdriver.
Before you begin, make sure the vacuum is turned off and unplugged from the power source.
Next, remove the dirt container by pressing the release button and empty it into a trash bag.
Take the cloth and gently wipe down the exterior of the vacuum to remove any loose dirt or debris.
Use the soft-bristle brush to clean the brush roll and remove any hair or tangled fibers.
If you encounter any issues during the cleaning process, refer to the troubleshooting tips provided in the user manual.
Removing and Emptying the Dirt Container
To remove and empty the dirt container, I simply squeeze the release latch and pull it out from the vacuum. It’s a straightforward process that allows me to easily dispose of the collected dirt and debris.
Here are some key steps to follow when emptying the dirt container:
- Step 1: Locate the release latch on the top of the vacuum.
- Step 2: Squeeze the latch firmly to disengage the dirt container.
- Step 3: Pull the container out from the vacuum body.
- Step 4: Hold the container over a trash bin and press the release button to open the bottom and empty the contents.
By following these steps, I can effectively remove and empty the dirt container, ensuring that my Bissell Pet Hair Eraser is always ready for the next cleaning session.
This process is particularly useful for removing pet hair, as it allows me to quickly dispose of the collected fur and maintain optimal vacuum performance.
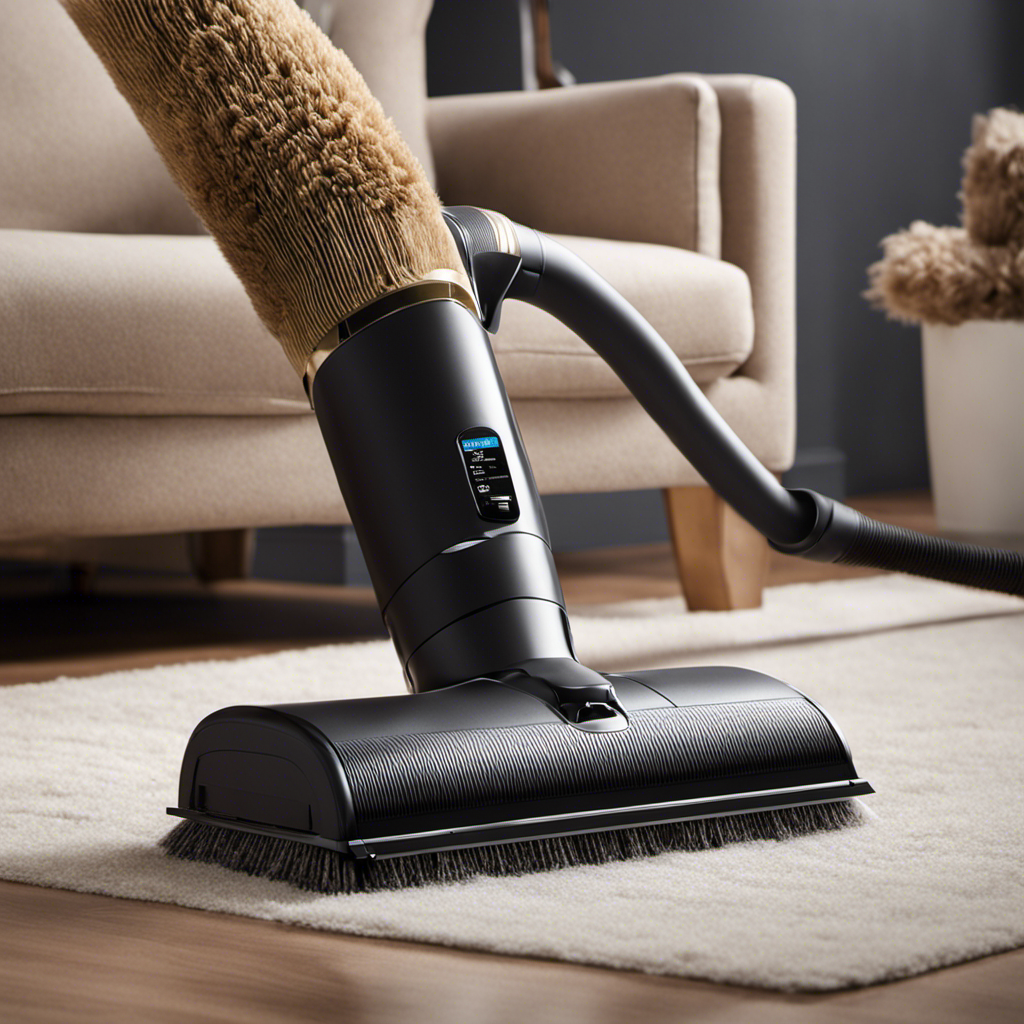
Cleaning the Brush Roll and Nozzle
After removing the dirt container, I simply rotate the vacuum’s brush roll to remove any tangled debris. This is an important step in maintaining the Bissell Pet Hair Eraser’s performance and efficiency.
The brush roll, located at the bottom of the vacuum, is responsible for agitating and lifting dirt and pet hair from surfaces. Over time, the bristles can become clogged with hair and other debris, reducing the vacuum’s effectiveness.
To clean the brush roll, I use a pair of scissors or a seam ripper to carefully cut away any tangled hair. It’s important to exercise caution while doing this to avoid damaging the bristles. Once the hair is removed, I rotate the brush roll a few times to ensure it spins freely. This step ensures optimal cleaning performance and prevents any further obstructions.
Now, let’s move on to clearing blockages and clogs.
Clearing Blockages and Clogs
First, I check for any blockages or clogs in the vacuum’s hose and attachments. Unclogging the suction is an essential step in troubleshooting common issues with the Bissell Pet Hair Eraser. Here are four things I do to ensure proper suction:
-
Inspect the hose for any obstructions or build-up of debris. I detach it from the vacuum and use a long, flexible brush or a straightened wire hanger to remove any clogs.
-
Check the attachments, such as the crevice tool or upholstery brush, for blockages. I remove any trapped debris by rinsing them under warm water or using a toothpick.
-
Examine the dirt container for any accumulated dirt or hair. I empty it and clean it thoroughly, ensuring there are no blockages in the container or filter.
-
Lastly, I inspect the brush roll for tangled hair or threads. I remove any obstructions and cut away any tangled debris, ensuring smooth rotation.
Maintaining and Storing Your Bissell Pet Hair Eraser
When I’m finished using my vacuum, I make sure to store it in a cool and dry place.
Proper maintenance and storage are essential for extending the lifespan of your Bissell Pet Hair Eraser.
To effectively remove pet hair, start by using the specialized pet hair attachment. This attachment has rubber bristles that attract and remove embedded pet hair from various surfaces.
Make sure to vacuum in different directions to loosen and capture all the hair.
Additionally, regularly empty the dirt container and clean the filters to maintain optimal suction power.
It’s also important to check for any blockages or clogs and remove them promptly.
Frequently Asked Questions
Can I Use the Bissell Pet Hair Eraser on Carpets and Upholstery?
Yes, you can use the Bissell Pet Hair Eraser on both carpets and upholstery. It’s a versatile tool that effectively removes pet hair from these surfaces, making carpet cleaning and upholstery cleaning a breeze.
How Often Should I Clean the Dirt Container?
Cleaning the dirt container regularly is essential for optimal performance and hygiene. By removing dirt and debris frequently, you ensure the longevity of your Bissell Pet Hair Eraser and enjoy the benefits of a clean and healthy home.
Can I Use the Bissell Pet Hair Eraser on Hardwood Floors?
Yes, you can use the Bissell Pet Hair Eraser on hardwood floors. It is designed to be safe and effective on various floor surfaces, including tile and hardwood. However, always check the manufacturer’s recommendations to prevent any potential scratching.
How Long Does It Take for the Brush Roll to Dry After Cleaning?
After cleaning the brush roll on my Bissell Pet Hair Eraser, it usually takes about 2-3 hours for it to fully dry. Proper brush roll maintenance is important for optimal performance and longevity of the vacuum.
Can I Use the Bissell Pet Hair Eraser on My Car Seats?
Yes, you can use the Bissell Pet Hair Eraser on your car seats. It’s a great tool for getting rid of pet hair and dirt. However, there are also alternative car seat cleaning methods you can try.
Conclusion
Overall, cleaning your Bissell Pet Hair Eraser is a simple and straightforward process that will keep your vacuum performing at its best.
While some may worry about the time and effort involved in maintaining their vacuum, the benefits of a clean and efficient machine far outweigh any inconvenience.
By following these steps regularly, you can ensure that your Bissell Pet Hair Eraser remains in top condition, allowing you to effortlessly tackle pet hair and keep your home clean and fresh.

Janet is an esteemed member of our dedicated team at Pet Hair Vacuum Critic, where her profound passion for pets and her exceptional writing talents combine to produce informative and engaging content for our readers.
Janet’s journey into the realm of pet care and pet hair management stems from her personal experiences as a devoted pet owner. Her firsthand understanding of the challenges and joys that come with living alongside furry companions fuels her dedication to assisting others in navigating the intricate world of pet hair removal and management.

As a pet owner, I understand the frustration of dealing with pet hair everywhere, including on air filters. But don’t fret! I have a quick solution to help you remove pet hair from your air filter.
In this article, I will guide you through the step-by-step process, provide you with useful tips, and emphasize the importance of regular air filter maintenance in pet-friendly homes.
Say goodbye to pesky pet hair and hello to cleaner, fresher air!
Key Takeaways
- Pet hair can clog up air filters, reducing their efficiency.
- Regular cleaning or replacement of air filters is crucial for maintaining indoor air quality.
- Using tools like a vacuum cleaner with a brush attachment and a soft-bristle brush can effectively remove pet hair from air filters.
- Preventive measures such as daily pet brushing, using high-quality air filters, regular vacuuming, and keeping pet bedding clean can help minimize pet hair buildup in air filters.
Understanding the Impact of Pet Hair on Air Filters
I’ve noticed that pet hair can really clog up air filters. It’s important to understand the impact of pet hair on air filters, especially for those with allergies.
Pet hair can contain allergens such as dander, pollen, and dust mites, which can exacerbate allergy symptoms. When these particles accumulate in the air filter, they can reduce the efficiency of the filter, leading to poor indoor air quality.
Regular cleaning of the air filter is crucial to maintain its effectiveness in removing pet hair and allergens from the air. Cleaning techniques may include vacuuming the filter or using compressed air to remove the trapped pet hair.
It’s also recommended to replace the filter regularly to ensure optimal performance and minimize the impact on allergies.
Tools and Materials Needed for Pet Hair Removal
To get started, you’ll need some basic items like gloves, a vacuum cleaner, and a soft-bristle brush for removing pet hair from your air filter. Proper tools and materials are essential for effective pet hair removal methods and best practices for cleaning air filters. Here are the recommended tools and materials:
| Tools | Materials |
|---|---|
| Gloves | Vacuum cleaner |
| Soft-bristle brush | Cleaning solution |
Gloves are necessary to protect your hands from allergens and dirt while handling the air filter. A vacuum cleaner with a brush attachment helps to remove loose pet hair from the filter efficiently. The soft-bristle brush is ideal for gentle cleaning and dislodging stubborn pet hair. Additionally, a suitable cleaning solution can be used to remove any stains or odors that may be present on the filter. By utilizing these tools and materials, you can ensure the thorough removal of pet hair from your air filter, improving its efficiency and extending its lifespan.
Now, let’s move on to the step-by-step guide to removing pet hair from air filters.
Step-By-Step Guide to Removing Pet Hair From Air Filters
Using gloves, I can protect my hands while handling the air filter during the process of removing pet hair.
To effectively remove pet hair from air filters, I follow these steps:
-
Step 1: Prepare the vacuum cleaner
-
Ensure the vacuum cleaner has a clean filter and is in good working condition.
-
Attach a crevice tool or brush attachment to the vacuum cleaner nozzle for better reach and suction.
-
Step 2: Vacuum the air filter
-
Gently remove the air filter from its housing.
-
Use the crevice tool or brush attachment to vacuum both sides of the filter, focusing on areas with visible pet hair.
In addition to the vacuum cleaner technique, there are natural alternatives to remove pet hair from air filters. These include using a lint roller or tape to pick up loose hair, or dampening a microfiber cloth with water or fabric softener to attract and collect the hair.
Remember to clean or replace the air filter regularly to maintain optimal airflow and minimize pet hair buildup.
Tips for Preventing Pet Hair Build-Up in Air Filters
One effective way to prevent excessive pet hair from accumulating in the air filters is by regularly grooming my furry companion. This not only helps to keep my pet’s coat healthy and reduce shedding, but it also reduces the amount of pet dander in the air, which can be a major cause of allergies. In addition to regular grooming, there are a few other tips I follow to prevent pet hair build-up in my air filters.
| Tips for Preventing Pet Hair Build-Up | Benefits |
|---|---|
| Brushing my pet daily | Reduces shedding and pet dander |
| Using a high-quality air filter | Filters out more pet hair and dander |
| Vacuuming regularly | Removes loose pet hair from surfaces |
| Keeping my pet’s bedding clean | Minimizes pet hair transfer |
| Using an air purifier | Helps to remove airborne pet dander |
Importance of Regular Air Filter Maintenance in Pet-Friendly Homes
Regularly maintaining my home’s air filters is crucial, especially in a pet-friendly environment, to ensure optimal indoor air quality and minimize allergens.
In a pet-friendly home, air purifiers offer several benefits in maintaining clean and healthy air. These include:
-
Reduction of pet hair and dander: Air purifiers effectively capture and filter out pet hair and dander, which are common allergens that can trigger respiratory issues in humans.
-
Odor elimination: Pet odors can be persistent and unpleasant. Air purifiers with activated carbon filters are designed to absorb and neutralize these odors, keeping your home smelling fresh.
-
Allergen removal: Pet hair and dander can contain allergens such as pollen, mold spores, and dust mites. Air purifiers with HEPA filters can effectively trap and remove these allergens, improving the overall air quality in your home.
Frequently Asked Questions
How Often Should I Clean or Replace My Air Filter if I Have Pets?
I clean or replace my air filter every 30 days since I have pets. It’s important to keep pet hair from clogging the filter to maintain optimal air quality and prevent damage to the HVAC system.
Can Pet Hair Actually Cause Damage to My Air Filter?
Pet hair can potentially cause damage to air filters. It can clog the filter, reducing its efficiency and increasing the risk of allergies. Regular cleaning techniques can help remove pet hair and maintain the filter’s performance.
Are There Any Specific Air Filters That Are More Effective at Trapping Pet Hair?
The most effective filters for trapping pet hair are those with high MERV ratings and electrostatic properties. However, alternative solutions like regular vacuuming and using air purifiers can also help reduce pet hair in the air.
Is It Necessary to Hire a Professional to Clean My Air Filter if It’s Been Heavily Clogged With Pet Hair?
It’s not necessary to hire a professional to clean a heavily clogged air filter with pet hair. Pros of using air purifiers for pet hair include improved air quality, but preventing pet hair from entering the filter is key.
What Are the Potential Health Risks Associated With Not Regularly Cleaning or Replacing Air Filters in Pet-Friendly Homes?
Not regularly cleaning or replacing air filters in pet-friendly homes can lead to potential health risks. Maintaining air quality in such homes requires proper maintenance of the filters to prevent the accumulation of harmful particles.
Conclusion
In conclusion, maintaining clean air filters in pet-friendly homes is crucial for both the health of our furry friends and our own well-being.
By regularly removing pet hair from air filters, we can ensure that the air we breathe is free from allergens and pollutants.
Just as we groom our pets to keep them healthy, we must also take the time to care for our air filters to maintain a clean and fresh living environment.
Janet is an esteemed member of our dedicated team at Pet Hair Vacuum Critic, where her profound passion for pets and her exceptional writing talents combine to produce informative and engaging content for our readers.
Janet’s journey into the realm of pet care and pet hair management stems from her personal experiences as a devoted pet owner. Her firsthand understanding of the challenges and joys that come with living alongside furry companions fuels her dedication to assisting others in navigating the intricate world of pet hair removal and management.
Wrapping myself in my cozy wool coat has always been a source of happiness for me, but the constant shedding from my furry companion turned it into a hairy situation.
Luckily, I’ve discovered some effective techniques for removing pet hair from wool coats. In this article, I’ll share the essential tools and supplies you’ll need, along with step-by-step instructions to ensure your coat stays pet hair-free.
Say goodbye to those pesky furballs and hello to a clean, stylish wool coat!
Key Takeaways
- Wool fabric attracts and traps pet hair easily, making it difficult to remove.
- Essential tools for removing pet hair from wool coats include a lint roller, masking tape, and a fabric brush with soft bristles.
- Preparing the wool coat by using a lint roller, masking tape, and brushing with a fabric brush helps prevent and remove pet hair.
- Effective techniques for removing pet hair from wool coats include using static electricity, dampened rubber gloves, and a clothes brush with stiff bristles.
Understanding the Challenges of Pet Hair Removal on Wool Coats
I’ve learned that removing pet hair from my wool coat can be quite challenging. Wool is a fabric that attracts pet hair easily, making it difficult to get rid of completely. The dense fibers of wool tend to trap the hair, making it stick stubbornly to the surface.
Brushing or shaking off the coat may not be enough to remove all the pet hair, as it can embed itself deep into the fabric. Additionally, the natural static electricity of wool can further exacerbate the difficulty in removing pet hair.
The challenges of pet hair removal on wool coats require special techniques and tools to effectively tackle the problem.
Essential Tools and Supplies for Removing Pet Hair From Wool Coats
To effectively tackle the task at hand, I’ll need a lint roller, masking tape, and a fabric brush to remove the pesky fur from my cozy wool coat. These tools and techniques are essential for successful pet hair removal. Let’s take a closer look at each one:
| Tools and Techniques | Description |
|---|---|
| Lint Roller | This sticky roller is perfect for quickly removing pet hair from the surface of your wool coat. Simply roll it over the fabric, and the adhesive will pick up the fur. |
| Masking Tape | Use masking tape to remove stubborn pet hair from hard-to-reach areas. Wrap a piece of tape around your hand, sticky side out, and pat it gently on the coat to lift the hair. |
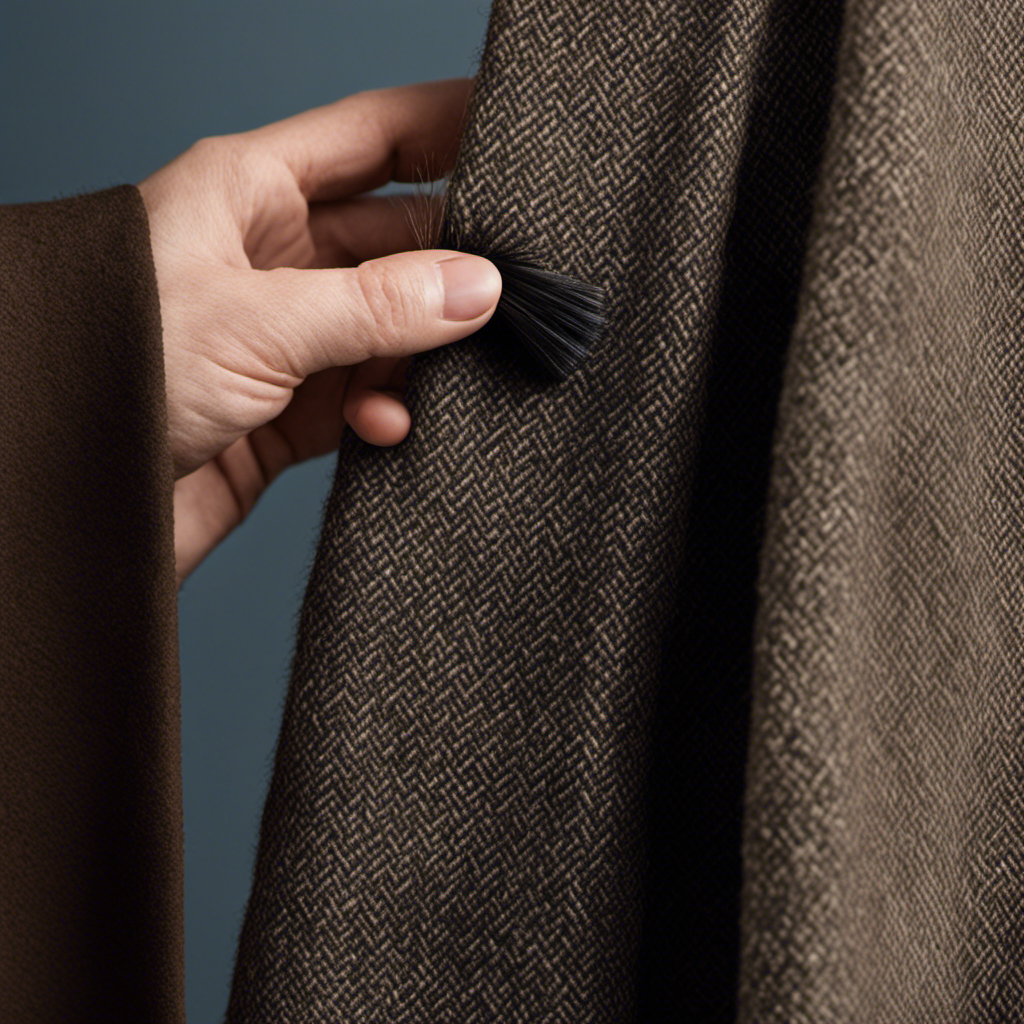
| Fabric Brush | A fabric brush with soft bristles is ideal for removing deeply embedded pet hair. Brush the coat in long, sweeping motions to loosen the fur and then use a lint roller or tape to pick it up. |
Preparing the Wool Coat for Pet Hair Removal
Using a lint roller, masking tape, and a fabric brush, I can effectively prepare my wool coat for the removal of pesky pet fur. Cleaning methods are essential to ensure a fur-free coat.
First, I start by using a lint roller to remove any loose pet hair on the surface of the coat. I gently roll the sticky adhesive over the fabric, making sure to cover every inch.
Next, I take a piece of masking tape and wrap it around my hand, sticky side out. I lightly press the tape onto the coat, patting it to pick up any remaining hair.
Finally, I gently brush the coat with a fabric brush to smooth out the fibers and remove any remaining pet hair.
These preventive measures help to keep my wool coat looking fresh and clean, even in the presence of fur-loving pets.
Effective Techniques for Removing Pet Hair From Wool Coats
Brushing the fabric vigorously with a lint roller helps to eliminate the presence of pesky pet fur on my wool coat. However, there are other effective techniques for removing pet hair from wool coats.
One helpful tool is static electricity. Rubbing a blown-up balloon or a dryer sheet on the coat creates static electricity, which attracts the pet hair and makes it easier to remove.
Another natural remedy is using rubber gloves. Dampen the gloves slightly and run your hands over the coat. The rubber texture will catch the pet hair, making it simple to peel off.
Additionally, a clothes brush with stiff bristles can be used to brush away pet hair. Gently stroke the coat in the opposite direction of the fur to loosen the hair, then use the brush to remove it.
These alternative methods are simple yet effective in ensuring a pet hair-free wool coat.
Maintaining a Pet Hair-Free Wool Coat: Tips and Tricks
I find that regularly employing static electricity, rubber gloves, and a clothes brush with stiff bristles helps me maintain a pet hair-free wool coat. Static electricity is a great tool for removing pet hair from clothing. I simply rub a balloon or a dryer sheet over the surface of my coat to create static, which attracts the hair and makes it easier to remove. Rubber gloves are another DIY solution that works wonders. I put on a pair of slightly damp gloves and run my hands over the coat, pressing firmly to lift the hair. The dampness helps to cling the hair to the gloves. Lastly, a clothes brush with stiff bristles is perfect for removing stubborn pet hair from wool. I use long, sweeping strokes to brush the coat, focusing on the areas with the most hair buildup.
To better illustrate these techniques, here is a helpful table:
| Technique | How to Use |
|---|---|
| Static Electricity | Rub a balloon or dryer sheet over the coat to create static. |
| Rubber Gloves | Put on slightly damp gloves and run hands over the coat. |
| Clothes Brush | Use long, sweeping strokes to brush the coat. |
| Focus on Problem Areas | Pay extra attention to areas with the most hair buildup. |
Frequently Asked Questions
Can I Use a Lint Roller to Remove Pet Hair From a Wool Coat?
Yes, I use a lint roller to remove pet hair from my wool coat. It’s effective and easy to use. However, there are alternatives like using a damp cloth or a rubber glove to remove the hair as well.
How Often Should I Remove Pet Hair From My Wool Coat?
I groom my pet regularly to minimize shedding and use home remedies to remove pet hair from clothing. It’s important to stay on top of it to keep my wool coat looking clean and fresh.
Can I Use a Fabric Softener Sheet to Remove Pet Hair From a Wool Coat?
Yes, you can use a fabric softener sheet to remove pet hair from a wool coat. However, there are alternative methods for removing pet hair from wool coats, such as using a lint roller or a damp cloth.
Is It Safe to Use a Vacuum Cleaner on a Wool Coat to Remove Pet Hair?
Using a vacuum cleaner on a wool coat may not be safe as it could damage the fabric. Instead, try hand washing the coat with a damp cloth to effectively remove pet hair.
Can I Use a Clothes Brush to Remove Pet Hair From a Wool Coat?
Using a clothes brush is an effective way to remove pet hair from a wool coat. However, there are alternative methods like lint rollers or sticky tape. It’s important to follow best practices to avoid damaging the fabric.
Conclusion
In conclusion, removing pet hair from wool coats can be a challenging task. However, with the right tools and techniques, it’s possible to maintain a pet hair-free coat.
Did you know that pet hair can be a major contributor to allergies and respiratory issues? By regularly removing pet hair from your wool coat, you can minimize these risks and keep your coat looking fresh and clean.
Remember to use gentle methods and take proper care of your wool coat to ensure its longevity.
Janet is an esteemed member of our dedicated team at Pet Hair Vacuum Critic, where her profound passion for pets and her exceptional writing talents combine to produce informative and engaging content for our readers.
Janet’s journey into the realm of pet care and pet hair management stems from her personal experiences as a devoted pet owner. Her firsthand understanding of the challenges and joys that come with living alongside furry companions fuels her dedication to assisting others in navigating the intricate world of pet hair removal and management.

I love cuddling with my pets, but I can’t stand the mess they leave on my bedding. Before washing, I’ve discovered some simple techniques to remove all that stubborn pet hair.
In this article, I’ll share my go-to tools and techniques for getting rid of pet hair effectively. From choosing the right brush to utilizing lint rollers and tape, I’ll show you how to make your sheets pet hair-free in no time.
Key Takeaways
- Lint roller, damp rubber glove, squeegee with a rubber edge, and regular brushing are effective tools for removing pet hair from sheets.
- Shaking the sheet vigorously, using a lint roller or sticky lint brush, dampening a rubber glove, and pre-washing methods help prepare the sheet for pet hair removal before washing.
- Lint roller or sticky brush, damp rubber glove, rubbing a fabric softener sheet, and regular brushing techniques are effective in removing pet hair from sheets.
- Dampening a lint roller, using lint rollers or tape, misting the fabric surface with water, and using a damp rubber glove or fabric softener sheet are expert tips for stubborn pet hair removal from sheets.
Choosing the Right Tools
I usually use a lint roller to remove pet hair before washing my sheets. It’s a simple and effective tool that easily picks up stray hairs from the fabric.
But there are other pet hair removal hacks that can help prevent hair buildup on your sheets.
One trick is to dampen a rubber glove and run it over the surface of your sheets. The static electricity created will attract the hair, making it easier to remove.
Another option is to use a squeegee, typically used for cleaning windows. Simply run it across the sheet, and the rubber edge will collect the pet hair.
Regularly brushing your pet’s fur can also help reduce shedding and prevent excessive hair from accumulating on your sheets.
Preparing the Sheet for Pet Hair Removal
To get rid of the pet hair on the sheet, I usually start by shaking it vigorously outside. This helps to loosen and remove any loose hair that may be stuck to the fabric.
Once I’ve done that, I move on to pre-washing methods to further eliminate the pesky pet hair. One effective method is to use a lint roller or a sticky lint brush. Simply roll or brush it over the sheet, focusing on areas where the hair is most concentrated.
Another natural remedy is to dampen a rubber glove and run it over the sheet. The static electricity will attract the hair and make it easier to remove.
These pre-washing methods are essential in preparing the sheet for a thorough wash.
Now, let’s move on to the next step: using effective brushing techniques.
Using Effective Brushing Techniques
Using a lint roller or sticky brush is an effective way to eliminate excess pet hair from the sheet. However, there are alternative methods worth considering to prevent pet hair buildup.
One such method is using a damp rubber glove. Simply dampen the glove and run your hand over the sheet to collect the hair. The dampness helps to attract the hair, making it easier to remove.
Another alternative is using a fabric softener sheet. Rubbing the sheet over the sheet will create static, allowing the hair to stick to it.
Additionally, regularly brushing your pet’s fur can help prevent excessive shedding and minimize the amount of hair that ends up on your sheets.
Utilizing Lint Rollers and Tape
After dampening the lint roller, I roll it over the sheet to easily pick up any pet hair. Lint rollers are a great tool for removing pet hair from fabric surfaces, including bed sheets. They’re designed with adhesive sheets that effectively trap and remove pet hair.
By dampening the roller slightly, it becomes even more effective at picking up stubborn pet hair. The moisture helps to weigh down the hair, making it easier to stick to the adhesive surface.
Lint rollers are a convenient and quick solution for removing pet hair before washing your sheets. However, if you prefer an alternative method, you can also try using wide tape or masking tape wrapped around your hand, sticky side out. This will achieve a similar result.
Expert Tips for Stubborn Pet Hair Removal
I find that lightly misting the fabric surface with water helps to loosen stubborn pet hair for easier removal.
When it comes to reducing pet shedding and keeping your sheets hair-free, there are alternative methods you can explore. Here are some expert tips for removing pet hair effectively:
- Use a rubber glove: Put on a damp rubber glove and run your hand over the fabric, the hair will stick to the glove.
- Try a fabric softener sheet: Rubbing a dryer sheet over the surface of your sheets can help attract and collect pet hair.
- Use a pet hair removal brush: These specially designed brushes have bristles that help lift and remove pet hair from fabric surfaces.
By incorporating these techniques into your routine, you can enjoy clean and hair-free sheets, promoting a more comfortable sleep environment.
Frequently Asked Questions
Can I Use a Vacuum Cleaner to Remove Pet Hair From My Sheets?
Yes, you can use a vacuum cleaner to remove pet hair from your sheets. However, there are other methods for removing pet hair such as using a lint roller, rubber gloves, or even dampening the sheets before washing.
Is It Necessary to Remove All the Pet Hair From the Sheets Before Washing Them?
It’s important to remove pet hair from sheets before washing them. Not only does it help keep the washing machine clean, but it also ensures that the sheets come out looking fresh and hair-free.
Can I Use a Fabric Softener to Prevent Pet Hair From Sticking to the Sheets?
Yes, you can use a fabric softener to help prevent pet hair from sticking to sheets. However, using a lint roller for pet hair removal and wetting the sheets before washing can also be effective methods.
What Should I Do if My Sheets Are Made of Delicate Fabric and Can’t Be Brushed?
If my sheets are delicate and can’t be brushed, I would consider alternative methods to remove pet hair. One option is to use a lint roller or tape to gently lift the hair. Another option is to take them to a professional dry cleaner.
Are There Any Specific Techniques for Removing Pet Hair From Fitted Sheets?
To remove pet hair from fitted sheets, I recommend using pet hair removal tools like lint rollers or rubber gloves. Alternatively, you can try using a damp cloth or a vacuum cleaner with a brush attachment.
Conclusion
In conclusion, removing pet hair from sheets can be a daunting task, but fear not! With the right tools, techniques, and a sprinkle of determination, you can conquer those furry obstacles.
Remember to choose tools that efficiently collect pet hair, prepare the sheet by shaking it vigorously, use effective brushing techniques, and don’t forget the power of lint rollers and tape.
With these expert tips, you’ll be saying goodbye to pet hair on your sheets and hello to clean, hair-free slumber. Rest easy, my friends.
Janet is an esteemed member of our dedicated team at Pet Hair Vacuum Critic, where her profound passion for pets and her exceptional writing talents combine to produce informative and engaging content for our readers.
Janet’s journey into the realm of pet care and pet hair management stems from her personal experiences as a devoted pet owner. Her firsthand understanding of the challenges and joys that come with living alongside furry companions fuels her dedication to assisting others in navigating the intricate world of pet hair removal and management.
-
 Guides & FAQs2 weeks ago
Local Customer Raves About Prompt Delivery
-
 Guides & FAQs2 weeks ago
Local Resident Raves About Amazing Service
-
 Vacuums for Pet Hair Removal3 months ago
What Is Different About a Pet Hair Vacuum
-
 Guides & FAQs2 weeks ago
Local Customer Raves About Graco’s Excellent Service
-
 Guides & FAQs2 weeks ago
Thrilled Customer Raves About Graco’s Outstanding Products
-
 Vacuums for Pet Hair Removal3 months ago
What Is Best Vacuum for Pet Hair
-
 Guides & FAQs2 weeks ago
Sydney Customer Raves About Amazing Paint Experience
-
 Guides & FAQs2 weeks ago
Pet Hair Under Contact Lense, What to Do