
Guides & FAQs
How to Make Felt From Pet Hair
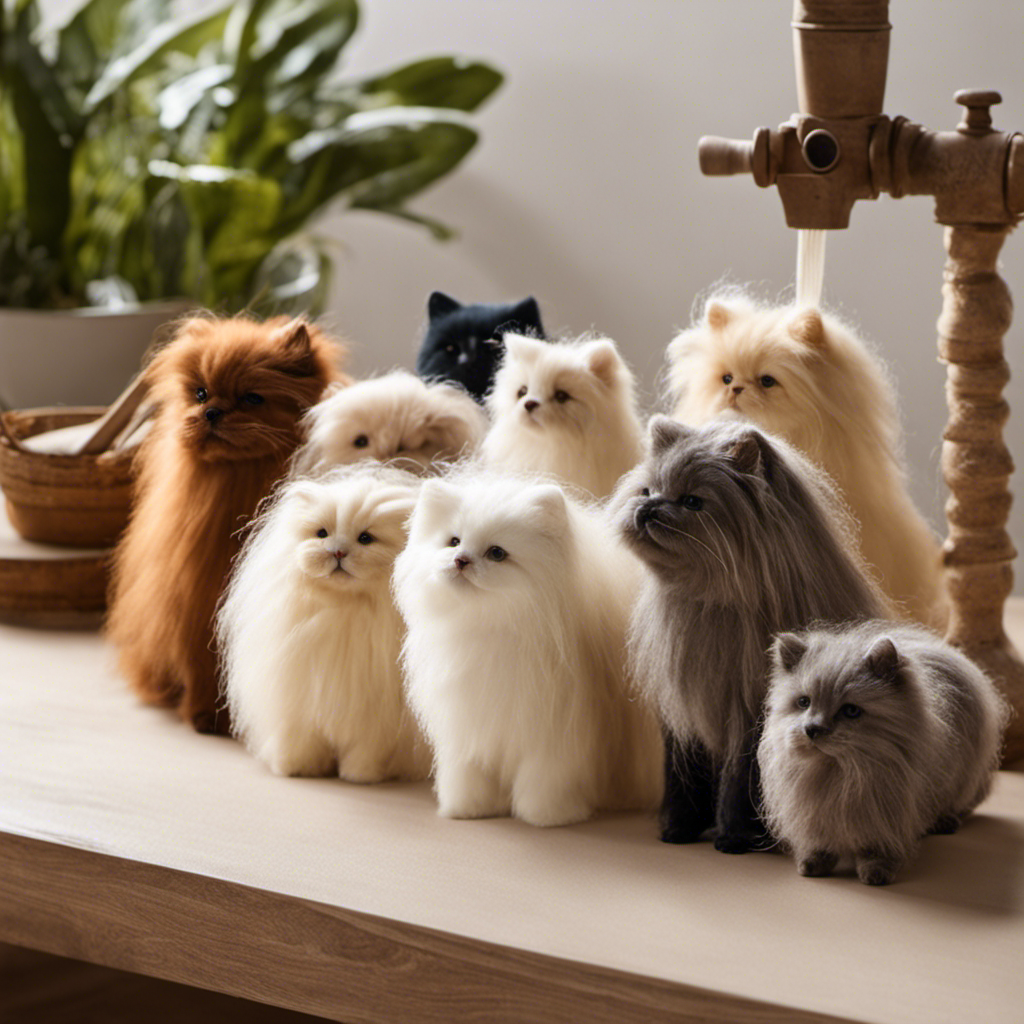
You may be asking yourself, “Why would anyone want to make felt out of pet hair?” But before you dismiss the idea, take a moment to discover the truly convincing reasons why it’s worth trying.
Not only is it a sustainable way to repurpose your pet’s shed hair, but it also creates a unique and personalized material for crafting.
In this article, I’ll guide you through the process of gathering, cleaning, carding, wet felting, and caring for your very own pet hair felt.
Let’s get started!
Key Takeaways
- Gathering and preparing pet hair is essential for felting, and it involves brushing the pet, using a fine-toothed comb, and collecting a sufficient amount of clean and tangle-free hair.
- Cleaning and sorting the pet hair is crucial, and it includes gathering loose fur, removing tangles or mats with a comb, washing the fur with pet-friendly shampoo, and air drying it before further processing.
- Carding the pet hair helps in creating a uniform texture, and it involves using a fine-toothed comb or hand carders with metal teeth to remove tangles or mats, loading carders with a small amount of hair, and brushing the fibers back and forth until they are ready for felting.
- Wet felting the pet hair is the final step, and it includes soaking the carded fibers in warm, soapy water, pressing and massaging them to create a solid piece, rolling them tightly into a cylindrical shape, agitating them against a textured surface to bond the fibers, and shaping and molding them as desired.
Gathering and Preparing Pet Hair

I’ll start by brushing my pet to gather and prepare their hair for making felt. This step is crucial in ensuring that the fibers are clean and free from any debris or tangles. I use a fine-toothed comb to gently remove any loose hairs, starting from the roots and combing towards the ends.
Once I’ve collected a sufficient amount of hair, I move on to the next step – spinning techniques. Spinning pet hair into yarn involves twisting and drafting the fibers to create a cohesive and strong thread. This can be done using a drop spindle or a spinning wheel, depending on personal preference.
Cleaning and Sorting the Pet Hair
To start cleaning and sorting, I’ll gather all the loose fur from my furry friend’s brush. I’ll use a fine-toothed comb to remove any tangles or mats.
Then, I’ll place the fur in a basin of warm water and add a small amount of pet-friendly shampoo. Gently agitating the water will help to remove any dirt or debris trapped in the hair.
After rinsing thoroughly, I’ll squeeze out the excess water and spread the fur out on a clean towel to air dry. Once dry, I’ll use a soft brush to remove any remaining loose hairs.
To store the cleaned and sorted fur, I’ll place it in an airtight container or sealable bag to protect it from moisture and pests.
Carding the Pet Hair
After gathering all the loose fur, I use a fine-toothed comb to remove tangles or mats. Once the hair is smooth and free from knots, I proceed to carding.
Choosing the right carding tools is crucial for efficient results. I opt for a pair of hand carders, which are small paddles covered in fine metal teeth. These tools help align the fibers in the pet hair and remove any remaining debris.
To card efficiently, I first load the carders with a small amount of hair and gently brush the fibers back and forth. This process helps separate and blend the hair, creating a uniform texture. I repeat this step until all the pet hair has been carded and is ready for felting.
Wet Felting the Pet Hair
Once the carded fibers are thoroughly soaked in warm, soapy water, I gently press and massage them to create a solid and compact piece. This step is crucial in the wet felting process, as it helps the fibers adhere together and form a strong bond.
To shape and mold the felted piece, I utilize various felting techniques. Here are the key steps I follow:
-
Rolling: I roll the wet fibers tightly to create a cylindrical shape, applying pressure evenly to ensure uniform felting.
-
Fulling: I agitate the felted piece by rubbing it against a textured surface, such as a washboard or bubble wrap. This helps further bond the fibers and tighten the felt.
-
Shaping: I manipulate the wet felt by stretching and pulling it into the desired shape. This allows me to create curves, angles, and intricate details.
-
Blocking: After shaping, I place the felted piece on a mold or form to maintain its shape while drying.
-
Drying: Once shaped and molded, I let the felted piece air dry completely before further embellishment or use.
Finishing and Caring for Your Pet Hair Felt
I carefully trim any excess fibers and inspect the finished felted piece for any loose ends or imperfections that may require further attention. Once satisfied with the quality of the felt, I proceed to store and preserve the pet hair felt creations. It is important to keep these items in a clean and dry environment to avoid any mold or mildew growth. To maintain the softness and durability of the felt, I recommend following these tips:
| Tips for Storing and Preserving Pet Hair Felt Creations | Tips for Maintaining Softness and Durability |
|---|---|
| Store in an airtight container or bag | Gently brush the felt to remove any dirt |
| Avoid exposure to direct sunlight | Avoid excessive stretching or pulling |
| Use silica gel packets to absorb moisture | Spot clean with a mild detergent if needed |
| Keep away from pets and sharp objects | Allow the felt to air dry flat |
Frequently Asked Questions
Can I Use Any Type of Pet Hair to Make Felt, or Are Certain Types of Fur More Suitable?
Long haired pet hair is generally more suitable for felting as it has longer individual fibers that interlock easily. Short haired pet hair can still be used but may require more processing. Alternative sources for pet hair can include groomers or animal sanctuaries.
How Much Pet Hair Do I Need to Make a Decent-Sized Piece of Felt?
To make a decent-sized piece of felt, you’ll need a significant amount of pet hair. Alternatives to pet hair, like wool or alpaca fiber, can also be used.
Can I Mix Different Types of Pet Hair Together to Make Felt, or Should I Stick to One Type?
Mixing different types of pet hair for making felt has benefits. It can create unique textures and colors. However, there are pros and cons to using fur from living pets versus deceased pets.
Can I Use Fur From a Deceased Pet to Make Felt, or Is It Better to Use Fur From a Living Pet?
Using deceased pet fur for felt making raises ethical concerns. While it’s technically possible, I recommend using fur from a living pet. For example, I used my dog’s fur to make felt, ensuring a sustainable and ethical approach.
Are There Any Special Considerations or Precautions I Should Take When Working With Pet Hair, Such as Allergies or Hygiene Concerns?
When working with pet hair, allergies and cross contamination are important considerations. Proper cleaning and sterilization of the hair can help minimize these risks. Hygiene concerns should also be addressed to ensure a safe working environment.
Conclusion
After following the detailed steps of gathering, cleaning, sorting, carding, wet felting, and finishing the pet hair, you’ll be amazed at the end result.
By utilizing this precise technique, you can transform your beloved pet’s hair into a beautiful and unique felt material.
Not only will you be able to create wonderful crafts, but you’ll also cherish the sentimental value that comes with using your pet’s fur in such a creative way.

Clarise is the guiding force behind the editorial excellence at Pet Hair Vacuum Critic. With a wealth of experience and a deep passion for pets, she brings a unique perspective to our team.
Clarise’s journey into the world of pet hair management began as a pet owner herself. Her hands-on experience, coupled with her natural curiosity, led her to delve into the nuances of keeping a clean and fur-free home while ensuring her pets were comfortable.

Have you ever wondered why a pet crematorium would send you a lock of your beloved pet’s fur as a pet owner? Although it may seem unusual initially, this gesture carries significant meaning.
In this article, we will explore the emotional connection between pet owners and their furry friends, the symbolism of receiving a lock of their hair, and the healing power it can provide.
Join me as we delve into the fascinating world of honoring our pets and finding comfort in their memory.
Key Takeaways
- Receiving a lock of their pet’s hair allows owners to feel their presence even after they’re gone.
- The hair serves as a tangible reminder of the bond shared and brings back cherished memories.
- Receiving the pet’s hair helps pet owners feel a continued connection to their furry friend.
- The hair holds deeper meaning and significance beyond being a physical memento.
The Significance of Receiving Part of Your Pet’s Hair From a Crematory
I really appreciate receiving part of my pet’s hair from the crematory because it serves as a meaningful keepsake of their presence in my life. Understanding grief and the deep emotional connection we’ve with our pets is essential in comprehending the significance of this gesture.
Losing a beloved pet can be a devastating experience, and finding ways to memorialize them can bring comfort and solace during the grieving process. Having a tangible reminder, like a lock of their hair, allows me to feel their presence even after they’re gone. It serves as a physical connection to the bond we shared and brings back cherished memories. This small token helps me honor their memory and provides a sense of closure.
Transitioning to the next section, let’s explore why pet owners are sent some of their pet’s hair and the emotional connection behind it.
Understanding the Emotional Connection: Why Pet Owners Are Sent Some of Their Pet’s Hair
Receiving a small amount of their beloved companion’s hair can help pet owners feel a continued connection to their furry friend. Understanding grief and the role of rituals in the healing process is crucial when it comes to comprehending why pet owners are sent some of their pet’s hair.
A lock of hair, carefully packaged, arrives in the mail, an intimate memento that holds memories and love. The touch of their fur against our skin, like a gentle caress, brings comfort and solace. As we hold that strand of hair in our hands, we can almost feel their presence, their warmth, their unconditional love.
The act of receiving their pet’s hair becomes a ritual, a way to honor their memory and continue to celebrate their life. It provides a tangible connection to a beloved companion who’s passed on. It helps to ease the pain of loss and allows for a sense of closure.
In these small strands of hair, we find solace, understanding, and a way to keep our furry friends close, even after they’re gone.
Exploring the Symbolism: What Does Receiving a Lock of Your Pet’s Hair Mean
Opening the package to find a lock of my furry friend’s hair felt like receiving a cherished symbol of their presence and love. It was more than just a physical memento; it held deeper meaning and significance.
Exploring the spiritual aspect of this gesture, it became apparent that the hair represented a spiritual connection between me and my beloved pet. In many cultures, hair is regarded as a powerful symbol of life force and vitality. By sending me this keepsake, the crematory acknowledged the profound bond I shared with my pet.
Furthermore, the therapeutic benefits of receiving a lock of my pet’s hair can’t be overstated. It provided comfort during the grieving process, offering a tangible reminder of their presence. This simple act of sending their hair helped bring closure and served as a source of solace during this difficult time.
The Healing Power of Keepsakes: How Pet Hair Can Provide Comfort and Closure
Finding comfort and closure in the midst of grief, the lock of my furry friend’s hair served as a tangible reminder of their presence and the love we shared. It may seem strange to some, but for those who’ve experienced the loss of a beloved pet, these keepsakes hold a healing power that’s difficult to put into words.
• The softness of the hair, much like the touch of their fur against my skin, brings a sense of warmth and familiarity, providing solace in moments of sadness.
• As I run my fingers through the strands, memories come flooding back – the way they’d curl up next to me on the couch, the sound of their purring as they nuzzled against my cheek.
-
These physical reminders offer a sense of closure, allowing me to hold onto the bond we shared even after their physical presence is gone.
-
The lock of hair becomes a connection, a way to keep them close and find solace in their memory.
Honoring Your Pet’s Memory: Why Crematories Include a Portion of Hair in Their Services
When I brought my beloved pet to the crematory, I was surprised to learn that they include a portion of hair in their services as a way to honor and remember our furry friends. This small but significant gesture highlights the importance of pet memorials and the role that crematories play in the grieving process.
Pet memorials serve as a tangible reminder of the love and companionship our pets brought into our lives. They provide comfort and closure during the difficult grieving process. Including a portion of hair in the cremation process allows us to hold onto a physical memento of our cherished pet, providing a source of solace and a tangible connection to their memory.
This thoughtful gesture from the crematory acknowledges the deep bond we share with our pets and helps us navigate the emotional journey of saying goodbye.
Frequently Asked Questions
How Is the Pet’s Hair Collected and Preserved by the Crematory?
When a pet passes away, crematories collect and preserve their hair as a way to honor their memory. Techniques like gentle brushing or shaving are used to collect the hair, which is then carefully preserved and sent to the pet owner as a keepsake.
Are There Any Specific Guidelines or Instructions for Handling and Storing the Received Lock of Hair?
When it comes to handling and storing the lock of hair sent by the crematory, there are specific guidelines and instructions to follow. It’s important to handle it with care and store it in a safe place to cherish the memories of our beloved pet.
Can the Pet Owner Choose to Receive a Different Keepsake Item Instead of Their Pet’s Hair?
As a pet owner, you have the option to choose alternative keepsake options instead of receiving your pet’s hair. We understand the sentimental value and offer a range of options to honor your beloved pet’s memory.
Do All Crematories Include a Portion of Hair in Their Services, or Is It an Optional Offering?
Sending a portion of a pet’s hair to the pet owner is an optional offering by crematories. It acknowledges the emotional connection owners have to their pet’s hair and provides a physical keepsake for comfort and remembrance.
Are There Any Cultural or Religious Significances Associated With Receiving a Lock of a Pet’s Hair From a Crematory?
Receiving a lock of a pet’s hair from a crematory can have cultural significance and religious symbolism. It is a way for pet owners to hold onto a physical connection and honor their beloved companion’s memory.
Conclusion
In conclusion, receiving a lock of your beloved pet’s hair from a crematory holds great significance. It symbolizes the emotional connection we’d with our furry companions and provides comfort and closure during the grieving process.
As the saying goes, ‘A lock of hair is a strand of love that forever binds us.’ Crematories understand the healing power of keepsakes and honor our pets’ memory by including this meaningful gesture in their services.

Janet is an esteemed member of our dedicated team at Pet Hair Vacuum Critic, where her profound passion for pets and her exceptional writing talents combine to produce informative and engaging content for our readers.
Janet’s journey into the realm of pet care and pet hair management stems from her personal experiences as a devoted pet owner. Her firsthand understanding of the challenges and joys that come with living alongside furry companions fuels her dedication to assisting others in navigating the intricate world of pet hair removal and management.
As a pet owner, I understand the importance of ensuring our treasured pets are happy and healthy.
One area that often gets overlooked is the hair on their feet. But let me tell you, cutting the bottom hair of their paws is crucial.
It not only prevents potential hazards, but also ensures their overall well-being.
In this article, I will delve into the reasons why we need to take this simple yet vital step in maintaining our pets’ feet.
Key Takeaways
- Regular grooming prevents foot infections.
- Overgrown hair can trap dirt, debris, and bacteria, leading to infections and inflammation.
- Trimming hair improves mobility and prevents discomfort and musculoskeletal issues.
- Maintaining well-groomed pet feet reduces the risk of infections, improves mobility, enhances traction, and promotes overall health and happiness.
The Importance of Regular Grooming for Pet Feet
I need to regularly groom my pet’s feet to keep them healthy and prevent any issues.
Grooming my pet’s feet is essential for preventing foot infections and improving their mobility. Regular grooming helps to remove dirt, debris, and excess hair from their paws, reducing the risk of infections caused by bacteria or fungi.
By keeping their feet clean and dry, I can prevent the growth of harmful microorganisms and the development of painful conditions such as fungal infections or hot spots.
Trimming the hair on their feet also contributes to better mobility, as excessive hair can cause discomfort and hinder their ability to walk or run properly.
Overall, regular grooming of my pet’s feet is crucial in maintaining their overall health and well-being.
Understanding the Potential Dangers of Overgrown Bottom Hair
Understanding the potential dangers of having overgrown hair on the bottom of my pet’s feet is crucial. Neglecting to regularly trim this hair can lead to a variety of potential risks and health concerns.
When hair on the bottom of a pet’s feet becomes too long, it can become matted, trapping dirt, debris, and bacteria. This can result in painful infections and inflammation.
Additionally, overgrown hair can cause pets to have difficulty walking or standing properly, leading to discomfort and potential musculoskeletal issues.
It’s important to trim this hair to prevent these problems and maintain your pet’s overall health and well-being. Regular grooming and keeping the hair on the bottom of your pet’s feet at a manageable length is a simple yet effective way to ensure their comfort and prevent potential health issues.
Tips for Safe and Effective Pet Feet Hair Trimming
Regularly trimming the hair on my pet’s feet is essential for their safety and comfort. Not only does it prevent matting and tangling, but it also reduces the risk of debris getting stuck between their toes. To achieve safe and effective pet feet hair trimming, it’s important to have the proper tools. A good pair of grooming scissors with rounded tips is ideal for this task. Additionally, using a comb or brush specifically designed for pets can help in detangling the hair before trimming.
To minimize discomfort during the trimming process, there are a few techniques that can be followed. First, it’s crucial to approach the task with patience and gentleness. Taking breaks in between cuts can help to prevent any pulling or tugging. Secondly, keeping the pet calm and relaxed is key. Offering treats or using positive reinforcement can help create a positive association with the trimming process. Lastly, trimming small amounts of hair at a time and gradually working towards the desired length can help prevent any accidental cuts or injuries.
Common Mistakes to Avoid When Cutting Pet Feet Bottom Hair
It’s important to avoid rushing the process when trimming my pet’s feet to prevent any accidental injuries. When it comes to cutting the bottom hair on my pet’s feet, there are some common mistakes that I need to avoid.
One of the most common mistakes is cutting too close to the skin, which can cause pain and potential bleeding. Another mistake is using dull or improper tools, which can lead to uneven cuts and discomfort for my pet. It’s also important to be mindful of the direction of the hair growth and to trim in small, controlled motions.
By avoiding these common mistakes and using proper trimming techniques, I can ensure a safe and effective trim for my pet’s feet.
Now, let’s explore the benefits of maintaining well-groomed pet feet.
Benefits of Maintaining Well-Groomed Pet Feet
Maintaining well-groomed feet for my pet has several benefits, such as preventing infections and discomfort. Regularly trimming the hair on my pet’s feet is an important preventative measure to ensure their overall health and happiness. Here are three key benefits of maintaining well-groomed pet feet:
-
Reduced risk of infections: Excess hair on the feet can trap dirt, debris, and moisture, creating the perfect breeding ground for bacteria and fungi. By regularly trimming the hair, I can minimize the risk of infections and keep my pet’s feet clean and healthy.
-
Improved mobility: Long hair on the feet can cause discomfort and restrict my pet’s movement. By keeping the hair properly groomed, I can help them walk, run, and play without any hindrance.
-
Enhanced traction: Overgrown hair on the feet can reduce traction, making it difficult for my pet to walk on smooth surfaces. Trimming the hair allows for better grip and stability, preventing slips and falls.
Frequently Asked Questions
How Often Should I Trim the Bottom Hair of My Pet’s Feet?
I trim the bottom hair of my pet’s feet every 4-6 weeks to prevent matting and discomfort. Signs that it needs trimming include excessive hair between the pads, difficulty walking, and debris getting stuck.
Can I Use Regular Scissors to Trim My Pet’s Bottom Hair, or Do I Need Special Grooming Tools?
Sure, I can help! When it comes to trimming your pet’s bottom hair, using regular scissors may not be the best idea. Special grooming tools provide precision and prevent accidents. Let me share some pros and cons, as well as alternative methods and tips!
Are There Any Specific Breeds That Are More Prone to Overgrown Bottom Hair?
Certain breeds, such as Poodles, Bichon Frises, and Shih Tzus, are more prone to overgrown bottom hair. Regular grooming and trimming are essential to prevent matting, discomfort, and hygiene issues in these breeds.
What Are the Signs That My Pet’s Bottom Hair Needs Trimming?
When it comes to signs of overgrown pet hair, it’s important to pay attention to excessive licking, odor, and difficulty walking. To trim your pet’s bottom hair, use sharp scissors and be gentle.
Are There Any Alternative Methods to Trim My Pet’s Bottom Hair if They Are Resistant to Grooming?
If your pet is resistant to grooming, there are alternative methods to trim their bottom hair. Some tips include using treats, distractions, and positive reinforcement. It’s important to be patient and gentle to ensure their comfort and safety.
Conclusion
In conclusion, trimming the bottom hair of our pets’ feet is vital for their overall well-being. Just like pruning a garden, it allows their paws to blossom and thrive.
By removing excess hair, we prevent potential dangers such as matting, debris accumulation, and discomfort. Regular grooming ensures that our furry friends can confidently walk, run, and explore the world around them.
So let’s give our pets the gift of well-groomed feet, paving the way for a happy and healthy journey ahead.
Janet is an esteemed member of our dedicated team at Pet Hair Vacuum Critic, where her profound passion for pets and her exceptional writing talents combine to produce informative and engaging content for our readers.
Janet’s journey into the realm of pet care and pet hair management stems from her personal experiences as a devoted pet owner. Her firsthand understanding of the challenges and joys that come with living alongside furry companions fuels her dedication to assisting others in navigating the intricate world of pet hair removal and management.
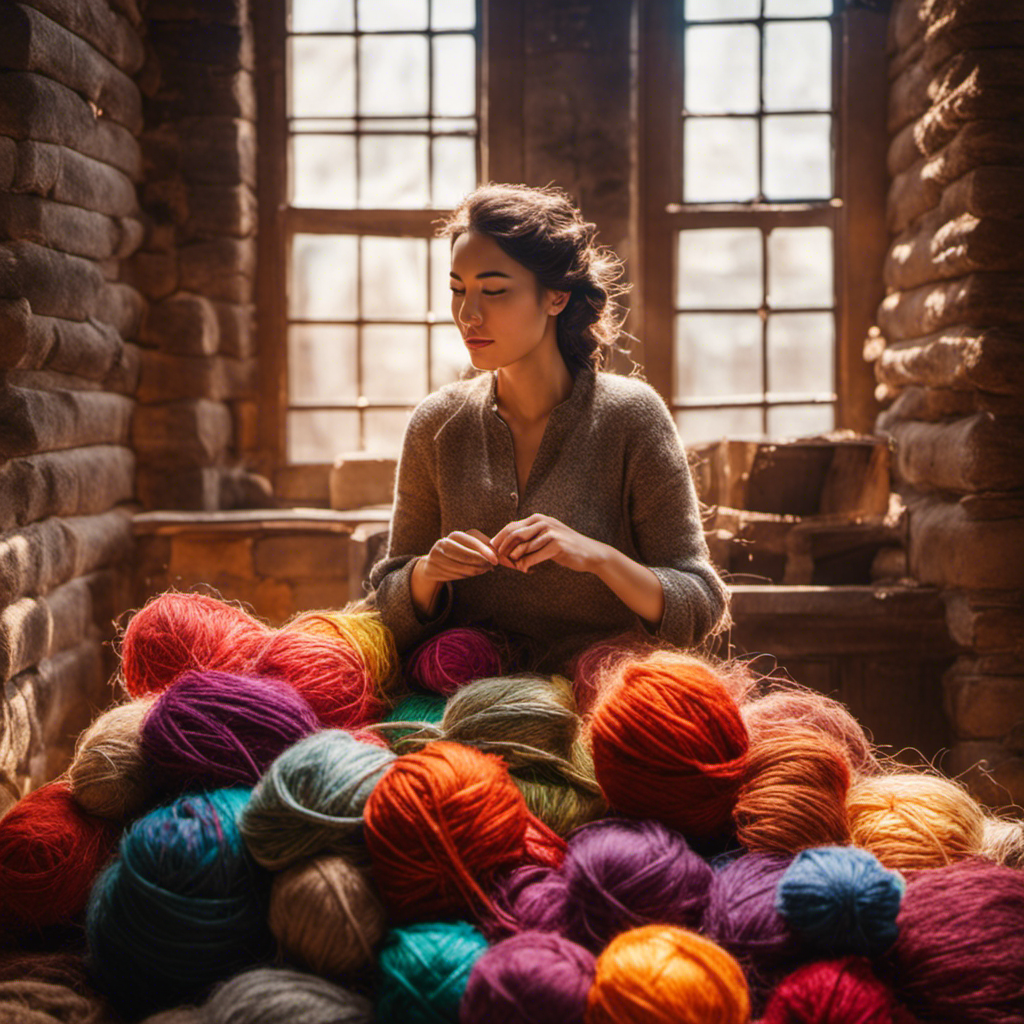
I am the woman who turns fluffy fur into cozy creations. Driven by a passion for knitting and a strong bond with my furry friends, I have honed the skill of transforming pet hair into yarn.
In this article, I’ll share the benefits, techniques, and patterns that can transform your pet’s shed hair into unique and sustainable garments. Join me as we unravel the secrets of this fascinating craft and learn how to care for these one-of-a-kind knitted treasures.
Key Takeaways
- Collecting and preparing pet hair for knitting requires careful grooming and specific techniques to ensure clean and undamaged fibers.
- Using pet hair as yarn allows for the creation of unique and sentimental keepsakes, adding a personal touch to knitting projects and fostering a deeper emotional bond with pets.
- Discovering unique patterns and repurposing pet hair can evoke nostalgia and create meaningful items, while also providing satisfaction from using alternative materials.
- Caring and maintaining knitted items made from pet hair involves regular grooming of pets, proper storage, and gentle washing to keep the items clean, soft, and free from excessive shedding.
The Art of Collecting Pet Hair for Knitting
I love collecting pet hair for knitting because it adds a personal touch to my projects. Collecting pet hair requires careful grooming and brushing of my furry friends. I use specific techniques to gather the hair, such as combing it gently to avoid damaging the fibers.
It’s important to collect hair that’s clean and free from dirt or debris. I often mix different types of pet hair to create unique textures and colors in my knitting projects. By collecting pet hair, I’m able to utilize a sustainable and eco-friendly resource, repurposing something that would otherwise go to waste.
Understanding the benefits of using pet hair as yarn allows me to create one-of-a-kind pieces that aren’t only beautiful but also hold sentimental value.
Understanding the Benefits of Using Pet Hair as Yarn
Using pet hair as yarn has numerous benefits, such as creating unique and sentimental keepsakes. It’s fascinating to explore the different types of pet hair suitable for knitting and discover creative ways to incorporate them into various projects.
Here are some emotional benefits of using pet hair as yarn:
-
Nostalgia: Knitting with pet hair allows us to preserve a physical connection to our beloved furry friends, creating a sense of comfort and nostalgia.
-
Personalization: Incorporating pet hair into knitting projects adds a personal touch, making each item truly one-of-a-kind and special.
-
Connection: Working with pet hair yarn fosters a deeper emotional bond with our pets, reminding us of the unconditional love they provide.
Techniques for Preparing Pet Hair for Knitting Projects
To prepare pet hair for knitting projects, it’s important to carefully wash and comb the hair to remove any dirt or debris.
Cleaning pet hair for knitting projects is essential to ensure that the final product is clean and free from any unwanted particles.
Firstly, I gently wash the pet hair using a mild shampoo and lukewarm water. This helps to remove any dirt or oils that may be present.
After thoroughly rinsing, I gently squeeze out the excess water and lay the hair flat to dry.
Once dry, I use a fine-toothed comb to remove any tangles or knots.
Dealing with allergies when working with pet hair yarn can be challenging. I recommend wearing gloves and a mask to minimize exposure to allergens.
Discovering Unique Patterns for Pet Hair Knitting
As a knitter, I love exploring different patterns that can be used with the unique texture of pet hair yarn. It’s fascinating to discover alternative materials for knitting and to find creative ways to repurpose pet hair.
Here are a few emotions that exploring these patterns can evoke:
-
Excitement: There’s a sense of excitement when I come across a new pattern that works well with pet hair yarn. It opens up a whole new world of possibilities and allows me to create something truly unique.
-
Nostalgia: Knitting with pet hair yarn often brings back fond memories of my beloved pet. It’s a way to keep a part of them close to me and create something meaningful.
-
Satisfaction: Seeing the finished product and knowing that it was made from pet hair yarn gives me a great sense of satisfaction. It’s a reminder of my creativity and resourcefulness in finding alternative materials for my craft.
Exploring these patterns not only allows me to create beautiful and one-of-a-kind pieces but also encourages me to think outside the box and find new ways to repurpose materials.
Tips for Caring and Maintaining Knitted Items Made From Pet Hair
I take pride in properly caring for and maintaining my knitted items made from pet hair yarn.
Caring for knitted items made from pet hair requires some special attention to prevent pet hair shedding. To keep my knitted items in good condition, I make sure to regularly brush and groom my pets to minimize shedding.
I also store my knitted items in sealed containers or bags to protect them from dust and pet hair. When washing these items, I use a gentle detergent and wash them in cold water to prevent any damage.
After washing, I lay them flat to dry to maintain their shape. By following these steps, I can ensure that my knitted items made from pet hair yarn stay clean, soft, and free from excessive shedding.
Frequently Asked Questions
How Long Does It Take to Collect Enough Pet Hair for a Knitting Project?
It typically takes a few months to collect enough pet hair for a knitting project. To store knitted items made from pet hair, I recommend using airtight containers to prevent odors and damage. Some tips for collecting pet hair efficiently include brushing your pet regularly and using a lint roller.
Can Any Type of Pet Hair Be Used for Knitting, or Are There Specific Types That Work Best?
Any type of pet hair can be used for knitting, but some types work better than others. Certain animals, like dogs and cats, have hair that is more suitable for knitting due to their long and soft strands. However, it’s important to consider allergies when working with pet hair.
Are There Any Special Techniques for Cleaning and Preparing Pet Hair Before Using It for Knitting?
There are several cleaning techniques and tips for preparing pet hair before using it for knitting. It’s important to remove any dirt or debris from the hair and to ensure it is well-combed and free of tangles.
Where Can I Find Unique Patterns Specifically Designed for Knitting With Pet Hair?
I found some unique knitting patterns specifically designed for knitting with pet hair. They can be found online on various knitting websites and forums. Just search for "knitting patterns for pet hair" and you’ll find a wide range of options to choose from.
Are There Any Special Care Instructions for Items Made From Pet Hair, Such as Washing or Storing Them?
When washing items made from pet hair, it’s important to use gentle, cold water and a mild detergent. Avoid wringing or twisting the item, instead gently squeeze out excess water and lay it flat to dry. To store, keep in a cool, dry place to prevent odors and damage.
Conclusion
In conclusion, the art of knitting with pet hair offers a unique and sustainable way to create beautiful and functional items. By understanding the benefits and techniques of collecting and preparing pet hair, knitters can explore endless possibilities for unique patterns.
With proper care and maintenance, these knitted items made from pet hair can be cherished for years to come. So why not turn your beloved pet’s fur into a one-of-a-kind masterpiece?
Janet is an esteemed member of our dedicated team at Pet Hair Vacuum Critic, where her profound passion for pets and her exceptional writing talents combine to produce informative and engaging content for our readers.
Janet’s journey into the realm of pet care and pet hair management stems from her personal experiences as a devoted pet owner. Her firsthand understanding of the challenges and joys that come with living alongside furry companions fuels her dedication to assisting others in navigating the intricate world of pet hair removal and management.
-
 Guides & FAQs2 weeks ago
Local Customer Raves About Prompt Delivery
-
 Vacuums for Pet Hair Removal3 months ago
What Is Different About a Pet Hair Vacuum
-
 Guides & FAQs2 weeks ago
Local Resident Raves About Amazing Service
-
 Guides & FAQs2 weeks ago
Local Customer Raves About Graco’s Excellent Service
-
 Guides & FAQs2 weeks ago
Thrilled Customer Raves About Graco’s Outstanding Products
-
 Vacuums for Pet Hair Removal3 months ago
What Is Best Vacuum for Pet Hair
-
 Guides & FAQs2 weeks ago
Sydney Customer Raves About Amazing Paint Experience
-
 Guides & FAQs2 weeks ago
Pet Hair Under Contact Lense, What to Do